
Elementor has emerged as a transformative solution for WordPress website building, empowering creators to design visually stunning and functional sites without needing to write a single line of code. Its intuitive interface and robust feature set are designed to accelerate workflows and enhance the overall quality of web projects.
Streamline Your Web Design Process: The Elementor Advantage
The core challenge in web development has long been the inherent tension between the time required for meticulous design and the need to deliver high-quality, user-friendly websites. Building a site from scratch involves numerous stages: conceptualization, wireframing, content integration, styling, and rigorous testing across devices. Each of these steps, when performed with a focus on detail and user experience, can be incredibly time-consuming. For freelancers and agencies managing multiple clients, this temporal pressure can lead to rushed decisions, overlooked details, and ultimately, a decline in the final product’s polish and effectiveness. This struggle to balance speed and quality is a persistent hurdle that many WordPress creators face daily.
Elementor directly addresses this challenge by providing a powerful visual editor that significantly shortens the development cycle. Within the WordPress ecosystem, Elementor acts as a bridge, connecting intricate design possibilities with user-friendly manipulation. Its drag-and-drop interface allows users to see changes in real-time, eliminating the need for constant code revisions and page reloads. This visual feedback loop is crucial for rapid iteration and allows creators to experiment with layouts and styles with unprecedented ease. By abstracting away much of the underlying code complexity, Elementor empowers users to focus on the creative aspects of web design and content presentation, making the process more enjoyable and less prone to errors.
The phrase “save hours” in the context of Elementor translates into tangible benefits that directly impact project profitability and client satisfaction. For an individual freelancer, saving hours means being able to take on more projects, dedicate more time to client consultations, or simply achieve a better work-life balance. For agencies, this time saving can be reinvested into business development, team training, or exploring more innovative design solutions. Furthermore, faster project completion allows for quicker invoicing and revenue generation. In essence, Elementor’s efficiency boost doesn’t just mean less time spent building; it means more time for strategic growth and creative refinement, ultimately leading to a more sustainable and successful web design business. This efficiency also allows for more robust user experience optimization, ensuring that the final product is not only attractive but also highly functional.
Mastering Responsive Design with Elementor’s Visual Toolkit
Elementor’s device preview feature is a game-changer for responsive design. Instead of relying on separate testing tools or guessing how a site will appear on different screens, Elementor offers a built-in inspector that allows you to visualize your website as it will render on desktops, tablets, and mobile devices directly within the editor. This real-time preview enables immediate adjustments, ensuring that your design is not just functional but also aesthetically pleasing across the entire spectrum of user devices. You can actively toggle between these views, making it straightforward to identify and correct any layout anomalies or spacing issues that might arise. This immediate feedback loop is crucial for creating a seamless user experience, regardless of how the visitor accesses your content.
Tailoring layouts for every screen size is fundamental to modern web design, and Elementor provides granular control over this process. For each section, column, and widget, you can define specific settings that apply only to certain device types. For instance, you might choose to stack columns vertically on mobile while displaying them horizontally on a desktop. Similarly, you can adjust image sizes, hide or show elements, and modify padding and margins independently for each breakpoint. This level of control ensures that your website’s structure and content hierarchy remain optimal, providing a clear and accessible experience for every user. This meticulous attention to detail prevents the common frustration of a desktop site that is unusable on a smartphone.
Readability and visual harmony are paramount, and Elementor’s responsive typography and spacing controls are key to achieving them. You can set different font sizes, line heights, and letter spacing for headings and body text across desktop, tablet, and mobile views. This ensures that text remains legible and engaging on smaller screens without requiring users to pinch and zoom. Likewise, adjusting margins and padding on a per-device basis helps maintain visual balance and prevents elements from feeling cramped or overly spread out. Effectively managing these elements contributes significantly to a site’s overall polish and enhances the user’s ability to consume content. Without these tools, achieving consistent readability across devices can be an arduous task.
A common pitfall in responsive design is creating a fixed layout that breaks when viewed on smaller screens, or making mobile adjustments that negatively impact the desktop experience. Another is neglecting to test thoroughly across a wide range of devices and operating systems. Elementor mitigates these risks by offering a visual, intuitive approach. The ability to set responsive styles for individual elements – from font sizes to visibility – means you’re not just adapting a desktop site; you’re actively designing for each environment. Furthermore, Elementor’s consistent interface for these settings reduces the learning curve and minimizes the chance of misconfigurations, making responsive design a manageable and predictable part of the workflow.
Accelerating Development: Pre-built Components and Templates
Leveraging extensive libraries of pre-built UI components, such as those found in CopyElement with over 4,000 options, dramatically accelerates the design and development process. These components, which can include navigation bars, footers, pricing tables, testimonial blocks, and much more, are meticulously designed and coded for Elementor. Instead of building these elements from scratch, which can take hours for complex designs, you can simply drag and drop them onto your page and customize them to fit your specific needs. This not only saves significant time but also ensures a high level of design quality and consistency across your website. Exploring these ready-made assets is a fundamental step towards faster WordPress website development with Elementor.
For those looking to launch niche websites, industry-specific templates offer an even more direct path to completion. Whether you’re building a site for a restaurant, a real estate agency, a photographer, or a SaaS company, professionally designed templates provide a solid foundation. These templates typically include pre-styled pages, layouts, and even placeholder content relevant to that industry. This means you’re not starting from a blank canvas; you’re working with a structure that already understands the typical user flows and content needs of a particular niche. This can drastically reduce the initial setup time and allow you to focus on customizing the content and branding for your client. The availability of such resources is a major benefit for agencies and freelancers aiming to streamline their workflow.
The sweet spot between using pre-built sections and maintaining design uniqueness lies in effective customization. While templates and components provide speed, the true power comes from adapting them to your specific brand identity and project requirements. Elementor makes this seamless. You can easily change colors, fonts, images, and text within any pre-built element. More advanced users can even modify the structure, add or remove widgets, and apply custom CSS. This ability to blend pre-made efficiency with bespoke design ensures that your website doesn’t look like a generic template. It allows you to create a site that is both built quickly and reflects a unique brand identity, a crucial balance for any successful web project.
Example: A marketing agency needed to quickly launch a series of high-converting landing pages for a new client campaign. Using CopyElement’s library, they selected a conversion-focused landing page template. Within just 30 minutes, they had dragged and dropped pre-built testimonial blocks, feature sections, and a clear call-to-action form. The remaining hour was spent customizing the copy, swapping out images for client-specific visuals, and adjusting the color scheme to match the client’s branding. The result was a polished, responsive landing page ready for A/B testing, completed in under two hours—a task that would have easily taken a full day if built from scratch.
Building Visually Stunning Sites Without Code: Elementor’s Drag-and-Drop Power
Demystifying Elementor’s interface is key for beginners. Upon opening the editor, you’re presented with a clean workspace: a canvas where your page takes shape, a sidebar containing all the available widgets, and a settings panel. The fundamental principle is simple: drag any widget from the sidebar onto the canvas and drop it where you want it to appear. Sections and columns form the structural backbone, and within these, you place your content widgets. The intuitive layout is designed to be immediately understandable, allowing new users to start building visually without needing extensive tutorials. Hovering over elements reveals editing options, and clicking brings up detailed styling and content controls.
The power of Elementor lies in its extensive widget library, which caters to virtually every design need. Beyond basic text and image widgets, you’ll find advanced options like image carousels, video players, animated headlines, accordions, toggles, and even forms. Each widget is designed to be highly customizable, allowing you to control its appearance, behavior, and content. For instance, a gallery widget can be configured to display images in various layouts, with different lightbox effects and spacing options. This rich set of tools means you can create complex and interactive layouts without ever touching code, making it a powerhouse for visual content presentation. Elementor: Elevate UX with Interactive Website Elements provides deeper insight into this.
Achieving professional aesthetics is effortless with Elementor’s comprehensive styling options. Every widget, column, and section offers a dedicated “Style” tab where you can fine-tune appearance. This includes controlling colors, typography, backgrounds (including gradients and videos), borders, shadows, and hover effects. For more advanced control, Elementor also supports custom CSS at element, column, section, and page levels. The ability to apply effects like motion and parallax scrolling further enhances visual appeal. This depth of styling control empowers users to create unique and polished designs that rival those of custom-coded websites, ensuring a sophisticated look and feel.
Maintaining brand consistency across an entire website can be challenging, especially when working with numerous pages and individual elements. Elementor’s Global Styles feature elegantly solves this problem. Here, you can define your primary colors, typography settings (including fonts, sizes, and weights for headings and body text), and button styles that will apply across your entire site. Once these global styles are set, any element you add that uses these defaults will automatically adopt them. If you later decide to change your brand’s primary color, a single update in the Global Styles settings will propagate that change across every instance of that color throughout your website, saving immense time and ensuring unwavering brand coherence.
Optimizing Elementor Sites for Speed and Performance
Achieving optimal website speed with Elementor is crucial for user retention and search engine rankings. Slow-loading sites lead to high bounce rates and lost opportunities. Fortunately, Elementor offers robust tools, and with strategic implementation, you can build high-performing websites. The goal is to minimize the resources a browser needs to download and render your pages. This involves carefully selecting the elements you use, optimizing media assets, and leveraging built-in Elementor features, alongside a mindful approach to additional plugins. A well-optimized site ensures a smooth experience for your visitors, regardless of their device or internet connection.
The key to performance lies in efficiency. Every widget, image, and script adds to the loading time. Elementor’s vast library, while powerful, can also be a source of bloat if not used judiciously. Understanding how each component impacts your site’s speed allows for informed decisions. For instance, using complex animations or heavy scripts unnecessarily can significantly degrade performance. Instead, focus on lightweight components and optimize them for speed. Many performance issues stem from client-side rendering and asset delivery. By addressing these proactively, you can ensure your Elementor-built sites are not only visually appealing but also lightning-fast, leading to better user engagement and conversion rates. Explore resources on optimizing Elementor website speed for deeper insights.
Performance-Conscious Component Choices from CopyElement
When building with Elementor, the choice of components is paramount for maintaining speed and responsiveness. CopyElement provides a curated library of over 4000 UI components, designed with performance in mind. Instead of relying on numerous small, unoptimized widgets that can collectively slow down a page, opt for pre-built, feature-rich components from a reputable source like CopyElement. These components are often built with efficiency, minimizing unnecessary code and maximizing functionality. For example, a single CopyElement advanced testimonial slider might replace multiple standard widgets for avatars, text, and navigation, all bundled into a highly optimized package.
The pitfall here is often using default Elementor widgets excessively or opting for third-party addons that are not optimized. This can lead to a bloated codebase and increased HTTP requests, directly impacting load times. When selecting components, consider their impact on your site’s Core Web Vitals. Elements that require extensive JavaScript or CSS can negatively affect metrics like Largest Contentful Paint (LCP) and Interaction to Next Paint (INP). CopyElement’s components are structured to reduce these impacts, allowing you to build complex designs without sacrificing speed. Prioritize components that offer the functionality you need with the least amount of overhead. Always test the performance of pages featuring new components to ensure they meet your speed benchmarks.
Image Optimization Strategies within Elementor
Images are often the largest contributors to page size and, consequently, load times. Within Elementor, neglecting image optimization is a common performance killer. The first step is to ensure all images are appropriately sized for their display dimensions. Uploading a 4000px wide image for a 500px display is a significant waste of resources. Secondly, compress images using lossless or lossy compression techniques. Tools like TinyPNG or ImageOptim can significantly reduce file sizes without a noticeable degradation in quality. Elementor itself offers basic image size controls, but for advanced optimization, consider integrating a dedicated image optimization plugin or ensuring your images are optimized before uploading.
Another critical strategy is to leverage lazy loading for images. This means images only load when they are about to enter the user’s viewport. Elementor has a native lazy loading option, which should be enabled for all images, especially those below the fold. Furthermore, consider using modern image formats like WebP, which offer superior compression and quality compared to JPEG or PNG. Many plugins can convert your images to WebP format automatically. The pitfall here is forgetting about optimization entirely or only optimizing a few images. A comprehensive approach ensures every visual asset contributes positively to your site’s performance. For example, a gallery with 20 high-resolution images that are not optimized or lazy-loaded can bring any website to a crawl.
Leveraging Elementor’s Built-in Speed Features
Elementor has evolved to include several features specifically designed to enhance website performance. One of the most impactful is its native support for lazy loading images and videos, which significantly reduces the initial load time by deferring the loading of offscreen media. Another crucial feature is the optimization of CSS and JavaScript. Elementor allows you to control how its assets are loaded, offering options to combine and inline critical CSS or defer non-essential JavaScript. These settings, found within Elementor’s settings panel, can dramatically improve page load speed and Core Web Vitals.
Be mindful of Elementor’s “Experiments” tab, where new performance-related features are often introduced. Activating these experiments, such as improved asset loading or CSS optimization, can provide significant speed boosts. However, always test thoroughly after enabling new experiments, as they are considered experimental and may occasionally cause conflicts. The pitfall is overlooking these built-in options, assuming they are not impactful. For instance, disabling unused widgets in Elementor’s settings can prevent their associated code from loading on pages where they aren’t present, leading to a cleaner and faster site. By actively exploring and utilizing these integrated features, you can fine-tune your Elementor-built sites for peak performance without relying solely on external plugins.
Minimizing Plugin Bloat for Faster Load Times
While Elementor is a powerful page builder, adding numerous third-party plugins can severely impact your website’s performance. Each plugin adds its own code, scripts, and potential database queries, all of which contribute to longer load times. The principle of “less is more” is especially relevant here. Before installing a new plugin, ask yourself if its functionality is truly essential or if Elementor or another existing plugin already provides similar capabilities. Regularly audit your installed plugins and deactivate or uninstall any that are no longer in use or are redundant.
Consider plugins that offer multiple functionalities instead of several single-purpose ones. For example, instead of separate plugins for social sharing, SEO, and caching, explore more comprehensive solutions. The pitfall is accumulating a collection of plugins without assessing their individual or collective impact on speed. A site with dozens of active plugins, even if they seem lightweight individually, can become sluggish. Optimized themes and starter kits, like those found on CopyElement, often include essential functionalities without requiring excessive add-on plugins. Regularly check your site’s performance using tools like Google PageSpeed Insights to identify which plugins might be causing slowdowns, and be prepared to find more efficient alternatives or consolidate functionalities.
Enhancing User Experience (UX) with Elementor’s Design Blocks
User experience (UX) is the cornerstone of a successful website. It dictates how easily and pleasantly visitors can interact with your content and achieve their goals. Elementor, with its intuitive drag-and-drop interface and extensive library of design blocks and widgets, empowers users to create visually appealing and highly functional websites that prioritize the user journey. By strategically employing Elementor’s design elements, you can guide visitors, reduce friction, and ensure they have a positive interaction that encourages them to return or convert. This involves more than just aesthetics; it’s about thoughtful organization, clear calls to action, and accessible design principles.
The goal of good UX is to make the user’s experience as seamless and enjoyable as possible. This means anticipating their needs, providing clear pathways to information, and ensuring content is easily digestible. Elementor’s flexibility allows for the creation of custom layouts and interactive elements that cater to specific audience behaviors. For example, using accordions to manage FAQs or tabs to organize detailed product information can prevent overwhelming users with text. The core principle is to reduce cognitive load and make the website feel intuitive. Focusing on UX from the initial design phase, rather than as an afterthought, ensures that the final product not only looks good but also performs exceptionally well in meeting user needs.
Designing Intuitive Navigation and User Flows
Effective navigation is the backbone of a positive user experience. In Elementor, this translates to designing clear, consistent, and logical pathways that allow users to find what they need quickly and effortlessly. The Header and Footer builders are essential tools for establishing global navigation. Ensure your primary menu is easily accessible, well-organized, and uses descriptive labels. Avoid overly complex or deep menu structures that can disorient users. Consider implementing breadcrumbs, especially on larger sites, to help users understand their current location within the site hierarchy.
When planning user flows, map out the typical journeys a visitor might take. For example, from landing on a homepage to finding a product, adding it to a cart, and completing a purchase. Elementor’s page and template capabilities allow you to design these flows sequentially, guiding users from one step to the next with clear calls to action. Use buttons, internal links, and strategically placed content blocks to direct users. The pitfall is creating a visually appealing site that lacks clear direction, leaving users feeling lost. For instance, a product page without a prominent “Add to Cart” button or clear links to related items hinders the user’s progress. Regularly test your navigation and user flows from the perspective of a new visitor to identify any points of confusion or friction.
Creating Engaging Visual Hierarchies with Layouts
A strong visual hierarchy guides the user’s eye through a page, highlighting the most important information and encouraging specific actions. Elementor’s layout options, including columns, sections, and containers, are fundamental to establishing this hierarchy. By manipulating size, color, contrast, and spacing, you can dictate what elements users notice first, second, and so on. For instance, a prominent hero section with a large headline, compelling image, and a clear call-to-action button at the top of the page immediately communicates the site’s purpose and value proposition.
Within Elementor, use headings (H1, H2, H3, etc.) correctly and consistently to denote content importance. Larger, bolder fonts for main headings and progressively smaller fonts for subheadings create a natural reading flow. Color plays a vital role; use accent colors strategically to draw attention to key elements like CTA buttons or important statistics. Spacing (whitespace) is equally important – it prevents visual clutter and helps differentiate content sections. The pitfall is creating a visually flat design where all elements compete for attention. For example, a page where every text element is the same size and weight, or where there’s no clear focal point, will confuse visitors. Elementor’s template library can offer examples of effective visual hierarchies that you can adapt for your own designs.
Incorporating Microinteractions and Dynamic Content
Microinteractions are small, often unnoticed, animations or feedback elements that enhance the user experience by providing immediate responses to user actions. Think of the subtle bounce of an icon when clicked, a button changing color on hover, or a form field highlighting when selected. Elementor allows for the creation of these subtle yet impactful elements using its motion effects, entrance animations, and custom CSS capabilities. These features add a layer of polish and responsiveness that makes a website feel more alive and engaging.
Dynamic content takes this a step further by personalizing the user experience. Elementor Pro enables you to display content that changes based on user data, time of day, or other conditions. This can include displaying personalized greetings, showing different content to logged-in users versus guests, or even tailoring product recommendations. The pitfall is either having a static, unengaging site or overusing animations to the point of distraction. Finding the right balance is key. For instance, a simple hover effect on a menu item is a microinteraction; a full-screen animation every time a user scrolls can be detrimental. Integrating these elements thoughtfully can significantly improve user satisfaction and engagement.
Best Practices for Accessibility in Elementor Designs
Creating accessible websites ensures that people with disabilities can perceive, understand, navigate, and interact with your content. Elementor provides tools and features that, when used correctly, can help you build accessible sites. This includes ensuring sufficient color contrast between text and backgrounds, using semantic HTML elements, and providing alternative text for images. Always use Elementor’s heading widgets to create a logical structure, which is vital for screen reader users.
When adding images, always fill out the “Alt Text” field in the Elementor media library with descriptive and meaningful text. This text is read by screen readers and used by search engines. For interactive elements like forms and buttons, ensure they have clear focus states—visual cues that indicate which element is currently selected. Avoid relying solely on color to convey information; use icons, text labels, or patterns in addition to color. The pitfall is assuming that because a site looks good, it is accessible. Conduct accessibility checks using browser extensions or online tools to identify and rectify issues. For example, ensuring your buttons have enough padding and a clear hover state makes them easier to click for users with motor impairments.
From Concept to Launch: Elementor Workflow Efficiency
Streamlining your workflow with Elementor is essential for timely project delivery and maximizing productivity, whether you’re a freelancer, agency, or small business owner. Elementor’s intuitive interface is a significant advantage, but a well-defined process takes efficiency to the next level. This involves setting up your environment correctly, leveraging version control, optimizing collaboration, and following a structured checklist. By adopting these practices, you can significantly reduce the time spent on development and minimize potential roadblocks from the initial concept right through to the final launch.
Efficiency in the Elementor workflow isn’t just about speed; it’s about creating a repeatable, reliable process that minimizes errors and enhances the quality of the final product. This means investing a small amount of time upfront in establishing robust workflows can yield substantial long-term benefits. When your process is smooth, you can handle more projects, deliver higher-quality results, and maintain client satisfaction. The focus is on proactive planning and the strategic use of Elementor’s features and complementary tools to build a system that works for you.
Setting Up Your Elementor Environment for Maximum Productivity
A well-configured Elementor environment is the foundation of a productive workflow. Begin by ensuring you have a clean, optimized WordPress installation. Choose a lightweight, Elementor-compatible theme like Hello Elementor, which acts as a blank canvas, minimizing conflicts and improving performance. Install only essential plugins. Beyond Elementor (and Elementor Pro, if needed), add only plugins that serve a distinct, critical purpose, such as SEO, security, or forms, and ensure they are well-coded and actively maintained. Regularly update WordPress, your theme, and all plugins to benefit from the latest features and security patches.
Organize your Elementor assets systematically. Create custom widget areas, global colors, and global fonts within Elementor’s settings. This ensures brand consistency and saves immense time when applying styles across multiple pages. For agencies or teams, consider using a staging environment for development and testing before pushing changes to the live site. This prevents unexpected issues and downtime. The pitfall is starting projects without proper setup, leading to a disorganized site and a chaotic development process. For example, not defining global styles means manually changing colors and fonts on every single page, which is highly inefficient and prone to inconsistencies. Take the time to configure Elementor’s Site Settings comprehensively.
Version Control and Revision History for Peace of Mind
Mistakes happen, and understanding how to recover from them is crucial. Elementor offers a robust revision history system that acts as a built-in safety net. For every page or template you edit, Elementor automatically saves previous versions, allowing you to revert to an earlier state if something goes wrong or you decide to undo a change. This feature is invaluable for backtracking when a design iteration isn’t working out or if an accidental deletion occurs. Beyond Elementor’s native capabilities, implementing more formal version control systems like Git can be a game-changer for complex projects and team collaboration.
While Elementor’s revisions are excellent for page-level changes, they don’t track theme updates or plugin changes. For comprehensive site-wide version control, integrating with a Git repository (like GitHub, GitLab, or Bitbucket) is the professional standard. This allows you to track every change made to your site’s files and database. The pitfall is relying solely on Elementor’s revisions and not having a backup strategy for your entire site, especially after major updates or when dealing with multiple collaborators. Regularly backing up your WordPress site—both files and database—is non-negotiable. Tools like UpdraftPlus or managed hosting backups provide this critical layer of security and peace of mind.
Collaborating with Teams Using Elementor
Effective collaboration is vital for agencies and larger teams working on Elementor projects. Elementor Pro introduces user role management, allowing you to assign specific permissions to different team members (e.g., Administrator, Editor, Contributor). This ensures that only authorized personnel can make critical changes, preventing accidental overwrites or unauthorized modifications. For designers who primarily focus on aesthetics, you can grant them access to design elements without giving them control over site settings or plugin management.
For more advanced collaboration, consider tools that facilitate communication and task management alongside Elementor. Platforms like Trello, Asana, or Slack can be integrated into your workflow to track progress, assign tasks, and discuss design decisions. When using a shared Elementor setup, clear communication protocols are essential. Define who is responsible for what, establish a workflow for content review and approval, and maintain consistent documentation. The pitfall is assuming everyone understands the process, leading to confusion, duplicated effort, or conflicts. For instance, two team members might simultaneously try to edit the same page without communicating, resulting in lost work. Utilizing Elementor’s template library can also streamline collaboration by providing a shared repository of reusable design blocks.
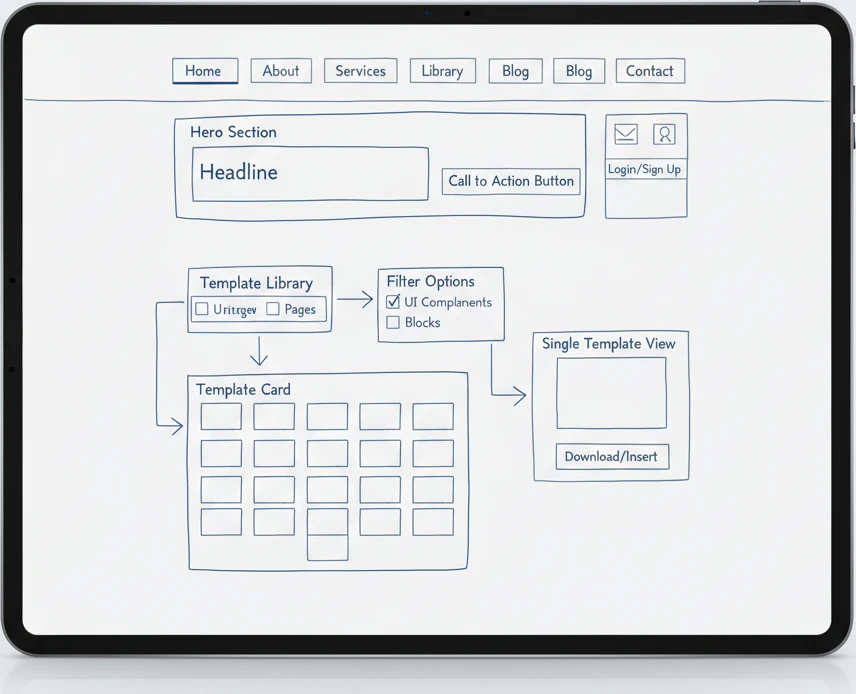
Checklist: Essential Steps for a Smooth Elementor Project Workflow
To ensure a seamless Elementor project from start to finish, follow a structured workflow. Begin with a clear project brief and wireframing to define scope and structure. Next, set up your development environment, installing a lightweight theme and essential plugins. Configure global styles, colors, and fonts within Elementor’s Site Settings to maintain brand consistency and efficiency. Develop key pages and templates, leveraging pre-built components and sections from libraries like CopyElement for faster design. Always use Elementor’s revision history and maintain regular backups throughout the process.
Before launch, perform thorough testing: check responsiveness across devices, test all interactive elements and forms, and conduct speed optimization tests. Ensure all content is proofread and accessible. Obtain client approval at key stages. The pitfall is skipping crucial steps like testing or client review, leading to post-launch issues and client dissatisfaction. A comprehensive checklist helps prevent oversights. For example, a final pre-launch check should include verifying that all links are functional, images are loading correctly, and the site adheres to accessibility standards. This methodical approach minimizes risk and ensures a polished, professional delivery.
Boosting Conversions: Elementor Features for Marketing Goals
Elementor is more than just a design tool; it’s a powerful platform for driving marketing objectives, particularly conversions. By strategically utilizing its extensive features, you can create websites and landing pages that are not only visually compelling but also highly effective at turning visitors into leads or customers. This involves crafting clear calls to action, designing persuasive landing pages, seamlessly integrating lead generation forms, and optimizing elements through A/B testing. The goal is to create a user journey that is both engaging and action-oriented, guiding visitors towards desired outcomes.
Converting visitors requires understanding their motivations and providing them with compelling reasons to take the next step. Elementor’s flexibility allows for highly customized experiences that speak directly to your target audience. By focusing on conversion rate optimization (CRO) principles and leveraging Elementor’s built-in marketing-centric widgets and features, you can transform your website into a high-performing sales or lead generation machine. Each element on your page should serve a purpose, contributing to the overall goal of driving action and achieving your marketing KPIs.
Designing High-Converting Call-to-Action Buttons
Call-to-Action (CTA) buttons are critical elements for driving conversions. In Elementor, the Button widget is highly versatile and customizable. To maximize conversion rates, focus on several key design principles. Firstly, button text should be action-oriented and benefit-driven. Instead of a generic “Click Here,” use phrases like “Get Your Free Quote,” “Download Now,” or “Start Your Free Trial.” Secondly, visual prominence is crucial. Use contrasting colors that stand out from the rest of the page, ensuring the button is easily visible. Consider its size and placement; it should be large enough to be tappable on mobile devices and strategically placed where users are likely to be ready to act.
Furthermore, incorporate subtle animations or hover effects to draw attention and provide feedback. Elementor’s motion effects and border options can help here. Test different button styles, colors, and text variations to see what resonates best with your audience. The pitfall is having CTA buttons that are camouflaged, use weak or passive language, or are difficult to find. For instance, a CTA button that blends into the background or uses text like “Submit” might not inspire action as effectively as a more direct and benefit-oriented alternative. Regularly analyze your website’s analytics to track button clicks and conversion rates, and use this data to refine your CTAs.
Crafting Persuasive Landing Pages with Elementor Templates
Landing pages are designed for a specific marketing campaign or offer and are crucial for capturing leads or driving sales. Elementor provides an extensive library of professionally designed landing page templates, which can be a massive time-saver and inspiration source. When selecting or designing a landing page, clarity and focus are paramount. Remove distracting navigation elements from your landing pages to keep visitors focused on the offer. Use compelling headlines that clearly state the benefit, followed by concise, persuasive copy that addresses the visitor’s pain points and highlights the value proposition.
Visuals should support the offer; use high-quality images or videos that resonate with your target audience. Elementor’s form widgets are essential for lead capture, so ensure they are prominently placed and ask only for necessary information. A common pitfall is creating landing pages that are too busy, unclear about their purpose, or lack a strong, singular call to action. For example, a landing page offering a free e-book should have a clear headline about the e-book, brief points on what it covers, and a straightforward form to download it, rather than multiple unrelated offers. Leveraging CopyElement’s conversion-focused landing page templates can significantly streamline this process.
Integrating Forms Seamlessly for Lead Generation
Forms are the primary tool for collecting leads in Elementor. Whether it’s a contact form, signup form, or lead generation form, its seamless integration and user-friendliness are vital for conversion. Elementor’s built-in Form widget (available in Elementor Pro) is powerful, allowing you to create multi-step forms, capture detailed information, and integrate with popular marketing platforms like Mailchimp, HubSpot, and more. Ensure your forms are designed to be intuitive, with clear labels for each field and appropriate validation to minimize errors.
Consider the number of fields: fewer fields often lead to higher completion rates. The pitfall is creating overly long or complicated forms that deter users from submitting their information. For example, asking for a user’s annual income on a newsletter signup form is likely to cause drop-offs. Always test your forms thoroughly on different devices and browsers to ensure they function correctly. The confirmation message or redirect after submission is also a key part of the user experience, so make it clear and potentially offer the next step, like “Check your inbox for the e-book.”
A/B Testing Layouts and Elements within Elementor
A/B testing, or split testing, is an indispensable method for optimizing conversion rates. It involves creating two or more versions of a webpage or element (e.g., a headline, a button color, a layout) and showing them to different segments of your audience to see which performs better. While Elementor doesn’t have built-in A/B testing functionality, it integrates seamlessly with external A/B testing tools and plugins. You can create variations of your pages or specific elements using Elementor and then use a tool like Google Optimize, VWO, or other WordPress A/B testing plugins to manage the testing process.
For instance, you could create two versions of a landing page: one with a video above the fold and another with a static image. You would then use an A/B testing tool to direct 50% of your traffic to each version and track which one generates more leads. The pitfall is making design decisions based on assumptions rather than data. Without A/B testing, you might be missing out on significant conversion improvements. Regularly test elements like CTA button text, hero section headlines, form field arrangements, and even the overall page layout to identify what truly drives your audience to convert.
Elementor and SEO: Building Sites That Rank
Elementor, while a powerful visual page builder, doesn’t automatically guarantee top search engine rankings. Achieving strong SEO performance requires a deliberate approach to how you structure and optimize your content within the builder. One of the most significant aspects is understanding and implementing semantic HTML structure. Elementor’s intuitive interface allows for drag-and-drop ease, but beneath the surface, it generates HTML code. Relying solely on the visual design without considering the underlying code can lead to messy or semantically incorrect markup, which search engines penalize. Using Elementor widgets intentionally, such as employing heading widgets for H1, H2, and H3 tags in a logical hierarchy, is crucial for conveying the importance and relationship of different content sections to both users and crawlers.
The choice of widgets and their placement directly impacts how search engines interpret your page’s content. For instance, using a simple text widget for a main title instead of the dedicated ‘Heading’ widget with the H1 tag sends the wrong signal. Always prioritize the correct hierarchy: one H1 per page (usually the main title), followed by H2s for major sections, and H3s for sub-sections. Beyond headings, consider how other content elements are represented. Using list widgets (ordered or unordered) for bullet points or steps, and paragraph widgets for body text, ensures clear semantic meaning. Elementor’s ability to create complex layouts can sometimes lead to content being visually prominent but structurally buried. A common pitfall is placing critical SEO content within image carousels or accordions that may not be fully crawled or easily accessible to all users. For example, describing product features within an accordion might hinder search engine bots from indexing that valuable information effectively. A better approach is to have key information readily visible in standard text blocks, potentially supported by interactive elements for supplementary details.
Ensuring your Elementor-built sites comply with mobile-first indexing is no longer optional; it’s a fundamental SEO requirement. Google primarily uses the mobile version of your content for indexing and ranking. Elementor’s responsive editing modes are invaluable here. Regularly switch between desktop, tablet, and mobile views to meticulously check layout, text size, button visibility, and overall user experience on smaller screens. A common mistake is assuming that if it looks okay on desktop, it will translate seamlessly to mobile. Often, text can become too small, buttons too close together, or entire sections might overflow or become unreadable. For instance, a wide table designed on a desktop might become a horizontal scrolling nightmare on mobile, frustrating users and signaling a poor experience to search engines. Always test your mobile views thoroughly, adjusting padding, margins, font sizes, and even hiding non-essential elements for smaller screens. Consider using Elementor’s responsive visibility options to conditionally display or hide content blocks based on the device, ensuring a clean and usable experience for all visitors.
To further bolster your SEO efforts within Elementor, integrating dedicated SEO plugins is a highly effective strategy. Plugins like Yoast SEO or Rank Math provide real-time feedback and guidance directly within the WordPress environment, often integrating with the Elementor editor. These tools help you analyze your content for target keywords, readability, meta descriptions, and internal linking opportunities. For example, when using Yoast SEO, you’ll receive a “green light” for a well-optimized page, guiding you on improvements. A key decision criterion when choosing a plugin is its compatibility and integration with Elementor. Some plugins might offer limited functionality within the visual builder, while others provide seamless assistance. A pitfall to avoid is over-reliance on plugin suggestions without understanding the underlying SEO principles. The plugin is a tool, not a replacement for strategic content planning. For instance, if a plugin suggests stuffing a keyword, resist the urge if it harms natural readability. Instead, focus on natural keyword integration and semantic relevance. Ensure your meta titles and descriptions are compelling and accurately reflect the page content, utilizing the plugin’s interface to craft these crucial elements effectively. For more in-depth SEO strategies with Elementor, explore resources that detail advanced optimization techniques.
Future-Proofing Your Elementor Skills in 2026 and Beyond
The digital landscape is in constant flux, and staying relevant with tools like Elementor requires a forward-thinking approach. As of 2026, the focus has sharpened on creating not just visually appealing websites, but also highly performant, accessible, and intelligently designed user experiences. Emerging trends in WordPress and Elementor development emphasize performance optimization as a core pillar, moving beyond basic speed checks to sophisticated caching strategies, efficient asset loading, and minimizing render-blocking resources. For instance, the ongoing evolution of Core Web Vitals means that subtle performance gains achieved through optimized Elementor builds can have a significant impact on rankings and user retention. A pitfall to avoid is continuing with outdated practices that may have been sufficient in previous years but are now detrimental to performance. This includes using excessive amounts of animations, poorly optimized images, or numerous third-party plugins that bloat website code. Instead, embrace the use of lightweight themes and plugins designed to work harmoniously with Elementor, and continually explore new methods for streamlining your builds, such as leveraging the capabilities of pre-built components like those offered by CopyElement to build faster, more efficient WordPress websites.
Adapting to new design paradigms is essential for maintaining a competitive edge. In 2026, this means a greater emphasis on user interface (UI) and user experience (UX) design principles that prioritize intuitive navigation, accessibility, and engaging micro-interactions. Elementor’s flexibility allows for a wide range of design approaches, but the trend is moving towards cleaner, more purposeful layouts that guide users effectively. Websites that are cluttered or difficult to navigate, even if visually striking, will likely see diminished engagement. A common pitfall is getting caught up in fleeting design fads without considering long-term usability. Instead, focus on timeless design principles, such as clear visual hierarchy, ample whitespace, and consistent branding. For example, the rise of AI-powered design tools may influence aesthetic trends, but the core principles of good UX remain constant. By understanding and applying these evolving design paradigms, you can create Elementor sites that are not only modern but also deeply user-centric and effective. Consider how interactive elements can enhance engagement without hindering performance or accessibility, as detailed in guides on elevating UX with interactive website elements.
Continuous learning is non-negotiable for any professional using dynamic tools like Elementor. The ecosystem around WordPress and page builders evolves rapidly, so staying updated with the latest features, best practices, and potential integrations is paramount. For advanced Elementor users, this means moving beyond basic tutorials and diving into more complex topics like custom theme building, advanced custom fields (ACF) integration, and JavaScript customization. Resources for this include official Elementor documentation, developer forums, and reputable blogs that offer in-depth guides and case studies. A pitfall to avoid is stagnation; relying on skills that haven’t been updated can lead to using inefficient methods or missing out on powerful new features. For instance, understanding how to leverage Elementor’s theme builder for dynamic content can drastically speed up the development of complex websites, a skill that requires dedicated learning. Furthermore, staying informed about security best practices for WordPress and Elementor is crucial for protecting your clients’ websites. The advent of more sophisticated tools means that learning should be an ongoing process, not a one-time event.
The evolving role of AI in Elementor website creation presents both opportunities and challenges for developers and designers. As of 2026, AI is increasingly integrated into workflows, assisting with tasks ranging from content generation and image optimization to code analysis and even basic design suggestions. This can significantly streamline the website building process, allowing creators to focus on higher-level strategic thinking and creative problem-solving. For example, AI-powered tools can help draft compelling meta descriptions or suggest variations of headlines, tasks that previously required significant manual effort. A critical consideration is how to effectively use AI as an assistant rather than a replacement for human creativity and critical judgment. Over-reliance on AI-generated content without review can lead to generic or inaccurate results, impacting SEO and user engagement. The future likely involves a symbiotic relationship where AI handles repetitive tasks, freeing up human expertise for complex design challenges, nuanced content strategy, and ensuring the overall quality and ethical implications of a website. This necessitates understanding how to prompt AI effectively and how to critically evaluate its outputs to maintain the integrity and distinctiveness of your work.