
Elementor is a powerful page builder, but even the best tools can suffer from performance issues if not used correctly. One of the most common culprits behind slow Elementor websites is, surprisingly, images. Optimizing images is not just about making them look good; it’s about ensuring they don’t bog down your site and frustrate your visitors. After all, a slow website can hurt your search engine ranking and even affect your conversion rates.
In this guide, we’ll delve into the world of Elementor image optimization. We’ll explore the best practices for choosing the right file formats, resizing images appropriately, and compressing them effectively. By the end, you’ll have the knowledge and tools to ensure your images enhance, rather than hinder, your Elementor website’s performance.
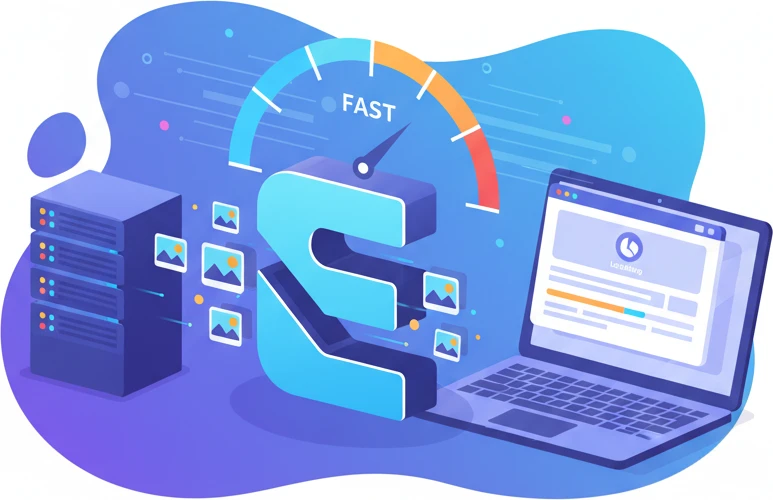
Is Elementor Slowing Down Your Site? The Image Optimization Connection
Why Images Are Often the Biggest Culprit in Slow Elementor Websites
Images are often the largest files on a webpage, especially on visually rich Elementor sites. High-resolution photos, uncompressed graphics, and unnecessary visual elements can significantly increase page load times. When a visitor lands on a page, their browser has to download all the assets, including images. The larger the images, the longer this process takes. Elementor, while offering great design flexibility, doesn’t automatically optimize images; it’s up to you to ensure they are properly prepared for the web. This involves reducing file size, choosing the correct format, and resizing appropriately. Neglecting these steps can lead to a sluggish user experience, increased bounce rates, and lower search engine rankings.
The Hidden Cost of Unoptimized Images (Beyond Page Speed)
The impact of unoptimized images extends beyond just slow loading times. Poor image optimization can negatively affect your website’s SEO, as Google considers page speed a ranking factor. Slow sites are penalized, pushing them down in search results. Additionally, unoptimized images consume more bandwidth, which can lead to increased hosting costs, especially on limited plans. Mobile users, often on slower connections, are particularly affected by large image files, potentially leading to a frustrating user experience and driving them away. Finally, large images take up significant storage space on your server, limiting your ability to store other important website files. Taking a proactive approach to image optimization protects your SEO, reduces bandwidth usage, improves the mobile experience, and manages server space effectively. Ensuring your website loads fast also helps to improve conversion rates. Faster websites generally lead to increased user engagement, more form submissions, and ultimately, more sales.
Understanding Image File Formats: Choosing the Right One for Elementor
JPEG vs. PNG vs. WebP: A Quick Comparison
Choosing the right image format is fundamental to efficient Elementor image optimization. JPEG (or JPG) is best for photographs and images with many colors, offering good compression at the cost of some image quality (lossy compression). PNG is ideal for graphics, logos, and images with text or transparency, using lossless compression to preserve image detail but resulting in larger file sizes. WebP is a modern image format developed by Google that offers superior compression and quality compared to both JPEG and PNG. It supports both lossy and lossless compression, as well as animation and transparency. Using WebP can significantly reduce file sizes without sacrificing visual quality, leading to faster loading times for your Elementor website.
When to Use Each Format (with Elementor-Specific Examples)
For product photos in an Elementor WooCommerce store, use JPEG with a compression level that balances file size and visual quality. For your logo, navigation icons, or graphics with transparency in your Elementor header or footer, use PNG to maintain sharp details and transparency. For most other images, including background images and hero sections built with Elementor, consider using WebP to achieve optimal compression and quality. Using WebP format for the background image of a hero section, for example, can substantially reduce its file size, resulting in faster page loading. Before using WebP, ensure your server supports it; most modern hosting providers do. If not, you may need to use a plugin to serve WebP images to compatible browsers while serving JPEG or PNG to older browsers.
Lossy vs. Lossless Compression: What’s the Difference?
Lossy compression reduces file size by discarding some image data, which can result in a loss of image quality. JPEG uses lossy compression, allowing you to significantly reduce file size, but with the potential for noticeable artifacts if the compression is too high. Lossless compression, on the other hand, reduces file size without losing any image data. PNG uses lossless compression, preserving the original image quality but resulting in larger file sizes compared to lossy formats. WebP supports both lossy and lossless compression, giving you the flexibility to choose the best option based on your specific needs. For example, when using AI-generated images for your website, understanding these differences will help you strike a balance between quality and file size, ensuring a smooth user experience without compromising visual appeal.
Image Resizing and Dimensions: A Crucial Elementor Optimization Step
Determining the Optimal Image Dimensions for Your Elementor Layout
Uploading excessively large images to your Elementor website is a common mistake that leads to performance issues. Before uploading an image, determine the exact dimensions it will be displayed at within your Elementor layout. For example, if you’re using an image as a background for a section that is 1200px wide and 400px high, there’s no need to upload an image that’s 3000px wide. Resizing the image to 1200x400px beforehand will significantly reduce its file size and improve loading times. Use image editing software like Adobe Photoshop, GIMP (free), or online tools to resize your images to the appropriate dimensions before uploading them to WordPress and inserting them into your Elementor pages. Inspect your Elementor layouts carefully to identify the exact dimensions required for each image.
Using Elementor’s Built-in Image Size Options Effectively
Elementor offers several built-in image size options, such as thumbnail, medium, large, and full size. These options allow you to select a pre-defined image size when inserting an image into your Elementor layout. However, relying solely on these options can be problematic if the original uploaded image is excessively large. WordPress automatically generates these sizes from the original upload, so if the original is huge, so will be the generated sizes. Instead, use these options after uploading a properly sized image. Choose the closest match to your required dimensions or create custom image sizes in WordPress settings for more precise control. This approach ensures that Elementor is serving optimized image sizes without relying on dynamically resizing excessively large files in the browser.
Pitfalls to Avoid: Uploading Massive Images and Letting Elementor Resize
One of the biggest performance killers in Elementor websites is uploading massive images and letting Elementor or the browser resize them on the fly. This practice forces the browser to download the entire large image file, even if it’s only displayed as a small thumbnail. This wastes bandwidth, slows down page loading, and degrades the user experience. Avoid uploading images directly from your camera or stock photo sites without resizing them first. Always resize images to the appropriate dimensions before uploading them to WordPress. If you absolutely must use a larger image, ensure that you use Elementor’s image settings to specify the correct display size and leverage CSS to control the image’s appearance, preventing the browser from downloading unnecessary data.
Compressing Images for Speed: Reducing File Size Without Sacrificing Quality
Free Online Image Compression Tools (Recommended for Beginners)
For beginners or those who need a quick and easy solution, several free online image compression tools are available. TinyPNG and ImageOptim (for Mac) are popular choices that use smart lossy compression techniques to reduce file size without significantly affecting image quality. Simply upload your images to these tools, and they will automatically compress them. Download the optimized images and upload them to your Elementor website. These tools are particularly useful for compressing JPEG and PNG images. Before using these tools, ensure they are reputable and respect your privacy. While convenient, these tools often have limitations on file size or the number of images you can compress at once. Remember to always save a backup of your original image before compressing it.
WordPress Plugins for Automated Image Compression (e.g., Smush, Imagify)
For a more automated and integrated approach, consider using WordPress plugins specifically designed for image compression, such as Smush, Imagify, or ShortPixel. These plugins automatically compress images as you upload them to your WordPress media library. They also offer features like bulk optimization, which allows you to compress all existing images on your website with a single click. Some plugins also provide WebP conversion and delivery, further improving your website’s performance. Many of these plugins offer both free and paid versions, with the paid versions typically offering more features and higher compression ratios. Evaluate your needs and choose a plugin that fits your budget and requirements. Regularly check your plugin settings and ensure that the compression levels are optimized for your website’s needs. Using a security plugin, alongside your chosen compression tool, can provide an additional layer of protection for your Elementor website.
Bulk Image Optimization Strategies for Large Elementor Websites
If you have a large Elementor website with hundreds or thousands of images, bulk image optimization is essential. Manually compressing each image would be incredibly time-consuming. Use a WordPress image compression plugin with bulk optimization capabilities. Before running a bulk optimization, back up your entire website to prevent data loss in case of any issues. Start with a test run on a small subset of images to ensure that the compression settings are appropriate for your website. Monitor your website’s performance after the bulk optimization to ensure that the changes have a positive impact on loading times. Consider scheduling regular bulk optimization runs to keep your images optimized as you add new content to your Elementor website. Example: A hypothetical CopyElement user, “Sarah,” running an online store with 2,000 product images, reduced her website’s total image size by 60% by using Imagify’s bulk optimization feature, resulting in a 35% improvement in page load times and a noticeable increase in conversion rates, increasing monthly sales by 12%.
Lazy Loading Images in Elementor: A Must-Have Performance Booster
How Lazy Loading Works and Why It’s Important
Lazy loading is a technique that defers the loading of images until they are needed, specifically when they are about to enter the viewport. Instead of loading all images on a page at once, which can significantly slow down the initial page load time, lazy loading only loads images as the user scrolls down the page. This dramatically improves perceived performance, making the website feel faster and more responsive. Imagine a long landing page built with Elementor. Without lazy loading, all those high-resolution images in the template will be downloaded immediately. With lazy loading enabled, the browser only fetches and displays images as the user scrolls, saving bandwidth and resources.
The importance of lazy loading stems from its direct impact on key metrics. Faster loading times lead to a better user experience, reduced bounce rates, improved SEO rankings (as Google considers page speed a ranking factor), and lower server costs due to reduced bandwidth consumption. Implementing lazy loading is a crucial step in optimizing your Elementor website for speed and performance. For example, a website selling handcrafted items with numerous product images saw a 20% decrease in bounce rate after implementing lazy loading.
Enabling Lazy Loading in Elementor (Native Support and Plugin Options)
Elementor offers built-in lazy loading capabilities. In Elementor’s settings (Elementor > Settings > Features), ensure that “Lazy Load” is active. This enables the browser-level lazy loading functionality. Most modern browsers support the loading attribute natively (loading="lazy"), allowing images to lazy load without the need for JavaScript libraries in many cases. However, you may need a polyfill for older browsers.
Alternatively, several plugins can enhance lazy loading functionality. These plugins often offer advanced features like placeholder images (blur-up effect) or more granular control over which images are lazy-loaded. When choosing a plugin, consider its performance impact, features, and compatibility with your Elementor setup. Ensure that the plugin is regularly updated and has positive reviews.
Testing Your Lazy Loading Implementation for Correct Functionality
After enabling lazy loading, it’s crucial to verify that it’s working correctly. The most straightforward way is to use your browser’s developer tools (usually accessed by pressing F12). Open the “Network” tab and filter by “Img” (images). As you scroll down the page, you should see images being loaded only when they come into view. If all images are loaded at once, lazy loading isn’t functioning as intended. You can also disable JavaScript in your browser temporarily to confirm the native lazy loading is working, as the lack of Javascript will prevent JS-based lazy loading from functioning.
Another way to test is using website speed testing tools like Google PageSpeed Insights. These tools will identify if images are properly lazy-loaded and provide suggestions for improvement. Pay attention to warnings or errors related to “Defer offscreen images”. If Google PageSpeed Insights reports a long “Time to Interactive,” lazy loading problems might be a contributing factor. Remember that lazy loading can interact unpredictably with certain plugins or theme features. It’s essential to thoroughly test your site after enabling it to ensure no conflicts arise.
Optimizing Elementor’s Image Widgets: Beyond Basic Settings
Using Elementor’s ‘Image Size’ setting effectively.
Elementor’s ‘Image Size’ setting within the image widget is a critical but often overlooked tool for optimization. This setting allows you to choose from various pre-defined image sizes (thumbnail, medium, large, full) or specify a custom size. Always select the smallest size that adequately displays the image’s visual content without pixelation or blurriness. Using a full-size image when a smaller version suffices wastes bandwidth and slows down page load times.
Before uploading images, resize them to the maximum dimensions they will be displayed at on your website. Elementor’s image size settings then allow you to select appropriate sizes for different breakpoints. If you have an image that will be 300px wide on desktop and 150px wide on mobile, you should resize the original image to around 300px wide before uploading. This avoids serving unnecessarily large images to mobile users. Be aware that if you choose “full size,” the original unoptimized image is served.
Leveraging Elementor’s ‘Caption’ feature for SEO benefit.
Elementor’s ‘Caption’ feature allows you to add a descriptive text below your image. While primarily intended for accessibility and user understanding, it can also contribute to SEO when used strategically. Captions provide additional context for both users and search engine crawlers. Write concise, descriptive captions that accurately reflect the image’s content and relevance to the surrounding text. Avoid keyword stuffing; instead, focus on natural language that enhances user experience.
Example: Instead of “SEO image optimization,” a better caption might be “Screenshot of Elementor’s image settings, showing options for image size and alt text, crucial for Elementor SEO.” Consider the user intent when crafting captions. Are they meant to provide additional information, explain a process, or highlight a key feature? Match the caption’s tone and style to the overall content of the page. When thoughtfully crafted, captions can improve engagement and provide subtle SEO benefits.
Image SEO for Elementor: Boosting Visibility in Search Engines
Crafting Effective Alt Text for Your Elementor Images
Alt text (alternative text) is an HTML attribute that provides a text description of an image. It’s essential for both accessibility (screen readers use it to describe images to visually impaired users) and SEO. Search engines use alt text to understand the content and context of an image. When writing alt text, be descriptive, concise, and relevant to the image and the surrounding content. Imagine you are describing the image to someone who cannot see it.
Example: Instead of “image1.jpg,” use “Elementor image widget settings panel showing image size options”. Include relevant keywords where appropriate, but avoid keyword stuffing. Each image should have unique alt text that accurately reflects its content. If an image is purely decorative and doesn’t convey any meaningful information, leave the alt text empty (alt=""). This signals to screen readers to ignore the image. Remember that well-written alt text not only improves SEO but also enhances the user experience for all visitors.
Using Descriptive File Names for SEO
Before uploading images to Elementor, rename the image files with descriptive, keyword-rich names. Instead of generic names like “IMG_1234.jpg,” use names like “elementor-image-optimization-tips.jpg.” This provides search engines with an additional signal about the image’s content. Use hyphens to separate words in the file name for better readability (both for humans and search engines). Lowercase letters are preferred for consistency.
Prioritize relevant keywords in the file name, but avoid excessive keyword stuffing. The file name should accurately reflect the image’s subject matter. For example, if the image shows a specific Elementor widget, include the widget’s name in the file name. Descriptive file names are a simple yet effective way to improve your website’s SEO and make your content more discoverable.
Optimizing Image Titles and Captions for User Engagement
While alt text is primarily for search engines and accessibility, image titles (the ‘Title’ attribute in the image tag) and captions are more directly aimed at user engagement. The title attribute displays as a tooltip when a user hovers over the image, providing additional information or context. Captions, as discussed earlier, appear below the image and offer a more detailed explanation.
Use image titles sparingly, as they can be disruptive if overused. Only add a title if it provides genuinely helpful information that isn’t already apparent from the image or surrounding text. Captions should be used more liberally to enhance understanding and engagement. A well-written caption can encourage users to spend more time on the page and interact with your content. For example, a caption could explain a complex process illustrated in the image, highlight a key feature of a product, or provide a humorous anecdote related to the image. Consider how the title and caption can complement each other to provide a richer user experience. A good UI/UX design incorporates thoughtfully crafted captions to support the visual content.
Leveraging Elementor’s Global Settings for Image Optimization Defaults
Setting Default Image Quality and Sizes for New Uploads
Elementor doesn’t directly offer global settings for default image quality. Image quality is typically controlled by WordPress itself and/or plugins. However, you can indirectly manage image quality by controlling the sizes WordPress generates when you upload an image. Go to Settings > Media in your WordPress dashboard. Here, you can set the maximum dimensions for thumbnails, medium-sized images, and large-sized images. These settings affect the sizes Elementor uses when you select an image size in the image widget.
By carefully adjusting these settings, you can limit the size and, indirectly, the quality of the images generated by WordPress. Remember that smaller image sizes mean lower file sizes and faster loading times. Regularly review these settings to ensure they align with your website’s design and performance goals. Avoid setting overly large dimensions, as this will result in unnecessary bandwidth consumption. You can also use plugins to control the image compression level globally.
Maintaining Consistency Across Your Elementor Website
Consistency is key when it comes to image optimization. Establish a clear set of guidelines for image size, file names, alt text, and captions, and ensure that all content creators adhere to them. This will not only improve your website’s performance but also enhance its overall user experience. Conduct regular audits of your image library to identify and address any inconsistencies. Look for images with missing alt text, overly large file sizes, or poorly optimized file names. Consider using a AI tool to automate image optimization tasks, such as generating alt text or compressing images.
Create a checklist or style guide that outlines your image optimization best practices. Share this guide with your team and make it readily accessible. Provide training on image optimization techniques to ensure everyone understands the importance of these practices. By fostering a culture of image optimization, you can ensure that your Elementor website remains fast, efficient, and user-friendly over time. Implement regular checks; for instance, audit 10 random pages quarterly to ensure compliance and identify areas for refinement.
Content Delivery Networks (CDNs): Supercharging Image Delivery for Elementor Sites
What is a CDN and How Does It Work?
A Content Delivery Network (CDN) is a geographically distributed network of servers that cache static content, such as images, and deliver it to users from the server closest to their location. This significantly reduces latency, the time it takes for a user’s browser to receive the requested data. When a user visits your Elementor website, the CDN intercepts the request for images and serves them from a nearby server. If the image isn’t already cached on that server, it fetches it from your origin server (your website’s hosting server) and stores it for future requests. The primary decision criterion when considering a CDN is its global reach – the more points of presence (PoPs) it has, the better its performance for a global audience. Another key factor is the CDN’s pricing structure, as some providers charge based on bandwidth usage, while others offer flat-rate plans. Using a CDN can greatly improve your website’s loading times and improve user experience.
Popular CDN Providers for WordPress and Elementor
Several excellent CDN providers integrate seamlessly with WordPress and Elementor. Cloudflare is a popular choice, offering a free plan with basic CDN functionality and paid plans with more advanced features, such as image optimization and DDoS protection. KeyCDN is another reliable option, known for its speed and pay-as-you-go pricing. StackPath provides a comprehensive suite of security and performance tools, including a CDN, WAF (Web Application Firewall), and DDoS mitigation. Amazon CloudFront is a robust and scalable CDN from Amazon Web Services (AWS), offering granular control and integration with other AWS services. Choosing the right CDN depends on your specific needs and budget. For example, if you are building an e-commerce site using Elementor, ensuring your website has adequate protection is a must, so you might also want to consider options with strong security integrations, like Cloudflare. You can even use a plugin like WP Rocket, which provides built-in CDN integration.
Configuring a CDN for Optimal Image Delivery
Configuring a CDN typically involves creating an account with your chosen provider, pointing your domain’s DNS records to the CDN’s servers, and integrating the CDN with your WordPress website. Many WordPress CDN plugins simplify this process. For example, the CDN Enabler plugin allows you to easily configure a CDN URL for your images and other static assets. You’ll also want to configure cache settings to ensure that your images are cached efficiently. Setting appropriate cache expiration times (e.g., one week or one month) prevents browsers from repeatedly requesting images from your origin server. You might also wish to configure a “cache-busting” mechanism, which automatically updates the cache whenever you change an image (for example, by adding a unique query parameter to the image URL). When setting up your CDN, avoid the pitfall of not properly configuring the CDN URL in your WordPress settings, which can lead to images still being served from your origin server.
Monitoring Your Elementor Website’s Image Performance: Identifying Bottlenecks
Using Google PageSpeed Insights to Analyze Image Optimization
Google PageSpeed Insights is a free tool that provides valuable insights into your website’s performance, including image optimization. It analyzes your website’s loading speed and identifies opportunities to improve image compression, resizing, and caching. PageSpeed Insights provides a score for both mobile and desktop performance, along with specific recommendations, such as “Properly size images” or “Serve images in next-gen formats.” Pay close attention to the “Opportunities” section, which highlights the most impactful areas for improvement. For example, if PageSpeed Insights recommends serving images in WebP format, you should consider using an image optimization plugin or CDN that automatically converts images to WebP. Regularly monitoring your PageSpeed Insights score and addressing the identified issues is essential for maintaining optimal image performance.
Leveraging GTmetrix for Detailed Performance Reports
GTmetrix is another popular website performance analysis tool that provides even more detailed reports than Google PageSpeed Insights. It offers a wealth of information about your website’s loading speed, including waterfall charts that show the loading time of each individual resource (including images). GTmetrix also provides detailed recommendations for improving image optimization, such as optimizing images for the web, specifying image dimensions, and using browser caching. A key advantage of GTmetrix is its ability to simulate different browser and device configurations, allowing you to identify performance issues specific to certain user segments. For instance, you might find that your website loads slowly on mobile devices with poor network connectivity. Use the reports to identify bottlenecks and prioritize optimization efforts.
Regularly Auditing Your Images for Continued Optimization (Especially Post-Update)
Website performance isn’t a “set it and forget it” task. Regularly auditing your images is essential for maintaining optimal performance, especially after website updates or content changes. As you add new images or update existing ones, ensure that they are properly optimized before uploading them. Also, keep an eye on your Google PageSpeed Insights and GTmetrix scores to identify any new performance issues. During audits, check image file sizes, compression levels, and formats. Also verify that your CDN is functioning correctly and that images are being served from the CDN’s cache. After major theme or plugin updates, perform a thorough audit to ensure that the updates haven’t introduced any new image optimization issues. Neglecting regular audits can lead to a gradual degradation of website performance over time. For instance, consider auditing your site’s performance whenever you implement new UI/UX design practices, such as those that may be found when browsing UI Kits for Elementor.
Common Elementor Image Optimization Mistakes (and How to Avoid Them)
Ignoring Image Optimization Entirely
One of the biggest mistakes website owners make is completely ignoring image optimization. This can result in large image files that significantly slow down website loading times, leading to a poor user experience and lower search engine rankings. Unoptimized images consume more bandwidth, increasing hosting costs and frustrating visitors. Ignoring image optimization can also negatively impact your website’s SEO. Search engines prioritize websites that load quickly, so slow-loading websites are less likely to rank highly in search results. To avoid this mistake, make image optimization a standard part of your website workflow. Before uploading any image to your Elementor website, always compress it, resize it to the appropriate dimensions, and choose the optimal file format (JPEG for photographs, PNG for graphics with transparency, and WebP for everything else).
Over-Compressing Images (Ruining Quality)
While compressing images is essential for optimization, over-compressing them can lead to a significant loss of quality. Over-compressed images can appear blurry, pixelated, or distorted, which can negatively impact your website’s visual appeal and credibility. The key is to find the right balance between image size and quality. Experiment with different compression levels to find the point at which the image size is significantly reduced without sacrificing too much quality. Most image optimization tools allow you to preview the image at different compression levels before saving it. Avoid the pitfall of blindly applying the highest compression settings without considering the impact on image quality. Instead, focus on achieving the smallest possible file size while maintaining acceptable visual quality. A good starting point is to aim for a compression level of around 60-80% for JPEGs.
Forgetting to Optimize Background Images
Many Elementor users focus solely on optimizing the images within their content, while neglecting to optimize background images used in sections, columns, and widgets. Background images can often be quite large, especially if they are high-resolution or cover the entire screen. Failing to optimize these images can significantly impact your website’s loading speed. Treat background images with the same level of care as you would treat content images. Compress them, resize them to the appropriate dimensions for their container, and choose the optimal file format. In Elementor, you can easily set background images for sections, columns, and widgets through the Style tab. Ensure you are using optimized versions of these images to minimize their impact on performance. This is especially true if you’re using parallax scrolling effects with background images, as larger images will cause even more performance degradation.
Advanced Image Optimization Techniques for Elementor: WebP Conversion and More
Automatically Converting Images to WebP Format
WebP is a modern image format developed by Google that offers superior compression and quality compared to JPEG and PNG. Converting your images to WebP can significantly reduce their file size without sacrificing visual quality, resulting in faster loading times. Several WordPress plugins, such as Imagify, ShortPixel, and Smush, can automatically convert your images to WebP format. These plugins typically create both WebP and JPEG/PNG versions of your images and serve the WebP version to browsers that support it (most modern browsers do). Ensure that your chosen plugin also provides a fallback mechanism for older browsers that don’t support WebP. This ensures that all users can view your images, regardless of their browser. Manually converting images to WebP can be tedious and time-consuming. Automation with a plugin is a worthwhile consideration.
Using Conditional Image Loading Based on Device Type
Conditional image loading involves serving different images based on the user’s device type (desktop, tablet, or mobile). This allows you to serve smaller, optimized images to mobile users, who typically have smaller screens and slower network connections. You can achieve conditional image loading using CSS media queries or JavaScript. However, the easiest approach is to use a WordPress plugin that supports responsive images and automatically handles conditional image loading. These plugins typically generate multiple versions of your images at different sizes and serve the appropriate version based on the user’s screen size. Conditional image loading can significantly improve the user experience on mobile devices by reducing loading times and conserving bandwidth.
Implementing Responsive Images with the `` Element
The <picture> element is an HTML tag that allows you to specify multiple image sources for different screen sizes and resolutions. This provides even more control over responsive image delivery than simple conditional image loading. The <picture> element allows you to specify different image formats (e.g., WebP and JPEG) for different browsers. While implementing the <picture> element manually can be complex, several WordPress plugins, such as the Optimole plugin, can automate the process. These plugins automatically generate the necessary <picture> code and serve the optimal image based on the user’s device, browser, and screen resolution. Properly implementing responsive images with the <picture> element can provide a significant performance boost, especially for users on high-resolution displays. Remember that focusing on accessibility is also key when using WordPress design; use the “alt” attributes for all images. You can also enhance your site’s overall security by applying best practices for Elementor website security.
By implementing these optimization strategies – using CDNs, monitoring performance, avoiding common mistakes, and leveraging advanced techniques like WebP conversion and responsive images – you can significantly improve your Elementor website’s loading speed and enhance the user experience. Remember to conduct regular audits to maintain optimal performance, especially after updates. Following these guidelines will contribute to a faster, more engaging, and ultimately, more successful website.
Content Delivery Networks (CDNs): Supercharging Image Delivery for Elementor Sites
A Content Delivery Network (CDN) is a geographically distributed network of servers that caches static content, such as images, and delivers it to users from the server closest to their location. This reduces latency and improves loading times, especially for visitors who are geographically distant from your website’s origin server. Using a CDN is one of the most effective ways to accelerate image delivery on your Elementor site.
What is a CDN and How Does It Work?
A CDN works by storing copies of your website’s static assets (including images, CSS files, and JavaScript files) on multiple servers around the world. When a user visits your website, the CDN automatically directs their request to the server that is geographically closest to them. This reduces the distance that the data has to travel, resulting in faster loading times. CDNs also offer other benefits, such as increased reliability and protection against DDoS attacks. They effectively distribute the load and minimize stress on your main server.
Popular CDN Providers for WordPress and Elementor
Several CDN providers are well-suited for WordPress and Elementor websites. Some popular options include:
- Cloudflare: Offers a free plan with basic CDN features, as well as paid plans with advanced features like image optimization and Web Application Firewall (WAF).
- StackPath: Provides a comprehensive CDN solution with global coverage and advanced security features.
- Amazon CloudFront: A highly scalable and reliable CDN service from Amazon Web Services.
- KeyCDN: A budget-friendly CDN provider with a focus on speed and performance.
Configuring a CDN for Optimal Image Delivery
Configuring a CDN for your Elementor website typically involves signing up for a CDN service, creating a CDN zone or distribution, and configuring your website to use the CDN’s URLs for static assets. Many WordPress plugins, such as WP Rocket, Perfmatters, and Breeze, can simplify the process of integrating a CDN with your website. These plugins automatically rewrite your website’s URLs to point to the CDN’s servers, ensuring that your images and other static assets are delivered from the CDN.
Monitoring Your Elementor Website’s Image Performance: Identifying Bottlenecks
Monitoring your Elementor website’s image performance is crucial for identifying bottlenecks and ensuring that your optimization efforts are paying off. Regularly tracking key metrics such as loading times, image sizes, and error rates can help you identify areas for improvement and maintain optimal performance over time. Performance should especially be monitored and optimized when using page builders such as the best Elementor addons and plugins.
Using Google PageSpeed Insights to Analyze Image Optimization
Google PageSpeed Insights is a free tool that analyzes your website’s performance and provides recommendations for improvement, including image optimization suggestions. PageSpeed Insights identifies unoptimized images, suggests appropriate image formats, and highlights opportunities to reduce image sizes. It provides both a score and specific guidance to help you improve your website’s performance.
Leveraging GTmetrix for Detailed Performance Reports
GTmetrix is another popular website performance testing tool that offers detailed reports on your website’s loading times, page size, and other key metrics. GTmetrix provides specific recommendations for optimizing your images, such as compressing images, using appropriate image formats, and leveraging browser caching. It also provides a waterfall chart that visualizes the loading sequence of your website’s assets, allowing you to identify bottlenecks and optimize the loading order.
Regularly Auditing Your Images for Continued Optimization (Especially Post-Update)
It’s essential to regularly audit your images for continued optimization, especially after making changes to your website or installing updates. Updates to WordPress, Elementor, or other plugins can sometimes introduce new images or modify existing ones, potentially impacting your website’s performance. Performing regular audits ensures that your images remain optimized and that any new issues are promptly addressed. These audits should check image file sizes, compression levels, and responsiveness across different devices.
Common Elementor Image Optimization Mistakes (and How to Avoid Them)
Even with the best intentions, it’s easy to make common mistakes when optimizing images for Elementor websites. Avoiding these pitfalls can significantly improve your website’s performance and user experience.
Ignoring Image Optimization Entirely
One of the biggest mistakes is ignoring image optimization altogether. Using unoptimized images, especially large, high-resolution files, can significantly slow down your website’s loading times and negatively impact the user experience. Always take the time to optimize your images before uploading them to your website. Simple optimizations like resizing and compressing can make a huge difference.
Over-Compressing Images (Ruining Quality)
While compressing images is essential, over-compressing them can lead to noticeable quality degradation. Finding the right balance between file size and image quality is crucial. Experiment with different compression levels to determine the optimal setting for each image. Use tools that allow you to preview the image quality at different compression levels to avoid sacrificing visual appeal.
Forgetting to Optimize Background Images
Background images are often overlooked when optimizing images for Elementor websites. However, background images can also contribute significantly to page size and loading times. Make sure to optimize background images in the same way as other images on your website. Resize them appropriately, compress them, and use the appropriate image format. You should also consider using CSS sprites or other techniques to reduce the number of HTTP requests for background images.
Advanced Image Optimization Techniques for Elementor: WebP Conversion and More
Beyond basic optimization techniques, several advanced strategies can further enhance your Elementor website’s image performance, including converting images to WebP format and using conditional image loading.
Automatically Converting Images to WebP Format
WebP is a modern image format developed by Google that offers superior compression and image quality compared to traditional formats like JPEG and PNG. Converting your images to WebP can significantly reduce file sizes without sacrificing visual appeal. Several WordPress plugins, such as Imagify, ShortPixel, and Optimole, can automatically convert your images to WebP format and serve them to browsers that support it. For browsers that don’t support WebP, these plugins typically serve the original JPEG or PNG versions.
Using Conditional Image Loading Based on Device Type
Conditional image loading involves serving different images based on the user’s device type (e.g., de
vice, screen size). This technique allows you to serve smaller, more optimized images to mobile users, further improving page loading times on smaller devices. You can implement conditional image loading using a plugin like Adaptive Images, or by using the <picture> element with appropriate media queries.
Implementing Responsive Images with the <picture> Element
The <picture> element is an HTML element that provides a more flexible way to specify multiple image sources for different screen sizes and resolutions. By using the <picture> element in conjunction with the <source> element and media queries, you can serve the most appropriate image to each user, optimizing their experience. Here’s more on the <picture> element. This also plays into SEO as Google will give a slight boost to responsive sites.
Content Delivery Networks (CDNs): Supercharging Image Delivery for Elementor Sites
A Content Delivery Network (CDN) can dramatically improve your Elementor website’s image loading speed by distributing your images across multiple servers located around the world. This ensures that users are served images from the server closest to their location, reducing latency and improving the overall user experience.
What is a CDN and How Does It Work?
A CDN is a network of geographically distributed servers that cache static content, such as images, CSS, and JavaScript files. When a user visits your website, the CDN server closest to their location delivers the cached content, reducing the distance the data needs to travel and improving loading times. CDNs also provide other benefits, such as increased security and improved website availability.
Popular CDN Providers for WordPress and Elementor
Several CDN providers offer solutions that are well-suited for WordPress and Elementor websites. Some popular options include Cloudflare, StackPath, Bunny.net, and Amazon CloudFront. Each provider offers different features, pricing plans, and levels of support, so it’s important to research and choose the one that best meets your needs and budget.
Configuring a CDN for Optimal Image Delivery
Configuring a CDN typically involves signing up for an account with a CDN provider, installing a WordPress plugin to integrate the CDN with your website, and configuring the plugin settings to specify which files to serve from the CDN. Most CDN providers offer detailed instructions and support to help you through the setup process. Often, you will simply need to change your domain’s DNS records to point to the CDN.
Monitoring Your Elementor Website’s Image Performance: Identifying Bottlenecks
Regularly monitoring your Elementor website’s image performance is crucial for identifying and addressing any bottlenecks that may be affecting loading times. Several tools and techniques can help you track your website’s performance and identify areas for improvement.
Using Google PageSpeed Insights to Analyze Image Optimization
Google PageSpeed Insights is a free tool that analyzes your website’s performance and provides recommendations for improvement. It identifies issues such as unoptimized images, large image sizes, and inefficient caching. By following the recommendations provided by PageSpeed Insights, you can significantly improve your website’s image performance.
Leveraging GTmetrix for Detailed Performance Reports
GTmetrix is another popular website performance analysis tool that provides detailed reports on your website’s loading times, page size, and other key metrics. GTmetrix also identifies specific image optimization issues and provides recommendations for resolving them. The waterfall chart provided by GTmetrix is invaluable for pinpointing specific images that are causing performance bottlenecks.
Regularly Auditing Your Images for Continued Optimization (Especially Post-Update)
Image optimization is not a one-time task. It’s important to regularly audit your images to ensure that they remain optimized as your website evolves. New images may be added, existing images may be updated, and changes to your Elementor theme or plugins may affect image performance. Regularly auditing your images will help you identify and address any new issues that may arise.
Common Elementor Image Optimization Mistakes (and How to Avoid Them)
Even with the best intentions, it’s easy to fall into common traps when optimizing images for your Elementor website. Understanding these mistakes and how to avoid them can significantly improve your website’s performance and user experience.
Ignoring Image Optimization Entirely
Perhaps the biggest mistake is simply ignoring image optimization altogether. Uploading large, unoptimized images directly to your website will significantly slow down loading times and negatively impact user experience. Make image optimization a standard part of your website workflow.
Over-Compressing Images (Ruining Quality)
While compression is essential, over-compressing images can result in a noticeable loss of quality. Find a balance between file size and visual appeal. Use appropriate compression settings and preview the results carefully before uploading images to your website. A slightly larger file size with better image quality is preferable to a heavily compressed, pixelated image.
Forgetting to Optimize Background Images
Background images are often overlooked when optimizing images for a website. However, these images can also contribute significantly to page load times. Make sure to optimize background images just as you would any other image on your website. Use the appropriate file format, compress the image, and resize it to the optimal dimensions.
Advanced Image Optimization Techniques for Elementor: WebP Conversion and More
Beyond the basics, several advanced techniques can further enhance image optimization for your Elementor website. These techniques involve using more sophisticated methods to reduce file sizes and improve loading times.
Automatically Converting Images to WebP Format
WebP is a modern image format developed by Google that offers superior compression compared to JPEG and PNG. Converting your images to WebP can significantly reduce file sizes without sacrificing image quality. Several WordPress plugins, such as Imagify and ShortPixel, can automatically convert your images to WebP format upon upload or in bulk.
Using Conditional Image Loading Based on Device Type
Conditional image loading allows you to serve different image sizes or formats based on the user’s device. This ensures that mobile users receive smaller, optimized images while desktop users receive larger, higher-quality images. This can be achieved through plugins or by implementing custom code using PHP and JavaScript.
Implementing Responsive Images with the <picture> Element
The <picture> element in HTML provides a more flexible way to specify multiple image sources for different screen sizes and resolutions. By using the <picture> element, you can ensure that the browser always loads the most appropriate image for the user’s device, improving performance and user experience. While Elementor has built-in responsive image features, understanding and using the <picture> element directly provides the most control.
Content Delivery Networks (CDNs): Supercharging Image Delivery for Elementor Sites
A Content Delivery Network (CDN) is a geographically distributed network of servers that cache static content, such as images, and deliver it to users from the server closest to their location. Using a CDN can significantly reduce latency and improve page load times, especially for websites with a global audience.
What is a CDN and How Does It Work?
A CDN works by storing copies of your website’s static assets on multiple servers around the world. When a user visits your website, the CDN automatically directs them to the server that is geographically closest to them. This reduces the distance that data has to travel, resulting in faster loading times and a better user experience.
Popular CDN Providers for WordPress and Elementor
Several CDN providers are compatible with WordPress and Elementor. Some popular options include Cloudflare, MaxCDN (now StackPath), and Amazon CloudFront. These services offer various features and pricing plans, so choose one that best suits your needs and budget.
Configuring a CDN for Optimal Image Delivery
Configuring a CDN typically involves signing up for a CDN service, integrating it with your WordPress website using a plugin or manual configuration, and configuring the CDN settings to cache your website’s static assets, including images. Most CDN providers offer detailed instructions and support to help you through the setup process.
Monitoring Your Elementor Website’s Image Performance: Identifying Bottlenecks
Regularly monitoring your website’s image performance is crucial for identifying bottlenecks and ensuring that your optimization efforts are effective. Several tools and techniques can help you track your website’s image loading times and identify areas for improvement.
Using Google PageSpeed Insights to Analyze Image Optimization
Google PageSpeed Insights is a free tool that analyzes your website’s performance and provides recommendations for improvement, including image optimization. It identifies unoptimized images, suggests appropriate file formats and compression settings, and provides an overall performance score.
Leveraging GTmetrix for Detailed Performance Reports
GTmetrix is another popular website performance testing tool that provides detailed reports on your website’s loading times, including image-related metrics. It identifies slow-loading images, highlights optimization opportunities, and provides recommendations for improving image performance.
Regularly Auditing Your Images for Continued Optimization (Especially Post-Update)
Website changes, such as theme updates or content additions, can sometimes introduce new image optimization issues. Regularly auditing your images ensures that your website remains optimized for performance. Use tools like Google PageSpeed Insights and GTmetrix to monitor your website’s image performance and address any new issues that arise.
Common Elementor Image Optimization Mistakes (and How to Avoid Them)
Even with the best intentions, it’s easy to make mistakes when optimizing images for an Elementor website. Understanding these common pitfalls can help you avoid them and ensure that your images are optimized for both performance and quality.
Ignoring Image Optimization Entirely
One of the biggest mistakes is neglecting image optimization altogether. Uploading large, unoptimized images can significantly slow down your website and negatively impact user experience. Always take the time to optimize your images before uploading them to your website.
Over-Compressing Images (Ruining Quality)
While compression is essential for reducing file sizes, over-compressing images can result in a loss of quality, making them appear pixelated or blurry. Striking the right balan