Is your Elementor website feeling sluggish? You’re not alone. Many users experience performance bottlenecks with Elementor, but the good news is that these are often easily addressed. By implementing a few key optimization strategies, you can dramatically improve your website’s loading speed and overall user experience. This guide provides a step-by-step approach to optimizing your Elementor website for peak performance.
We will cover image optimization, browser caching, CSS and JavaScript minification, and other critical techniques. By the end of this guide, you’ll have a clear understanding of how to identify and resolve common performance issues, leading to a faster, more engaging website for your visitors.
Frustrated with Slow Elementor Websites? You’re Not Alone!
The Impact of Slow Loading Times on User Experience and SEO
Slow loading times are a killer for any website, but they’re especially detrimental for websites built with page builders like Elementor. From a user experience perspective, visitors are impatient. Studies show that a significant percentage of users will abandon a website if it takes longer than 3 seconds to load. This leads to a higher bounce rate, lower engagement, and ultimately, fewer conversions. If you’re building a sales funnel with Elementor, slow loading times can ruin your efforts. Creating a positive user experience is critical to ensure visitors remain engaged.
Beyond user experience, search engine optimization (SEO) is heavily influenced by page speed. Google and other search engines consider page speed as a ranking factor. Websites that load quickly tend to rank higher in search results, leading to increased organic traffic. A slow website can effectively bury your content, making it harder for potential customers to find you. Google uses Core Web Vitals to measure user experience and give weight to loading speed.
Why Elementor Sites Can Sometimes Be Slow (and How to Fix It)
Elementor, while powerful and flexible, can sometimes contribute to slow loading times if not used optimally. One common reason is the excessive use of plugins. While plugins extend functionality, each one adds to the overall load on your server. It’s crucial to audit your plugins regularly and remove any that are unnecessary or poorly coded. Another cause can be unoptimized images. Large, uncompressed images significantly increase page size and loading time. Elementor’s flexibility encourages users to add content but without consideration of optimization, a page can easily become bloated.
Additionally, relying heavily on complex animations and effects without proper optimization can strain resources. Consider using CSS animations over JavaScript when possible, as CSS animations are generally more performant. Finally, ensure your hosting environment is adequately provisioned for your website’s traffic and resource demands. Shared hosting plans might struggle with resource-intensive Elementor websites. Consider upgrading to a VPS or managed WordPress hosting for better performance. Check if your hosting provides managed services to help with website speed such as managed IT.
Step 1: Optimize Your Images for Web Performance

Choosing the Right Image Format: JPEG vs. PNG vs. WebP (Pros and Cons)
Selecting the right image format is fundamental to image optimization. JPEG (or JPG) is generally ideal for photographs and images with many colors because it uses lossy compression to significantly reduce file size. However, this compression can introduce artifacts and reduce image quality if overdone. PNG, on the other hand, is better suited for images with sharp lines, text, logos, and graphics with transparency. PNG uses lossless compression, preserving image quality but resulting in larger file sizes compared to JPEG.
WebP is a modern image format developed by Google that offers superior compression and image quality compared to both JPEG and PNG. WebP supports both lossy and lossless compression, making it versatile for various image types. While WebP offers significant advantages, browser support was initially a concern. However, as of 2026, the format is widely supported across modern browsers, making it an excellent choice for web images. Using a modern format will reduce bandwidth consumption and improve user experience. For advanced Elementor users, consider using Elementor image optimization tips to enhance your optimization workflow.
Image Compression Techniques: Lossy vs. Lossless
Understanding lossy and lossless compression is crucial for making informed decisions about image optimization. Lossy compression permanently removes some data from the image, resulting in a smaller file size but potentially sacrificing image quality. This is suitable for images where minor quality loss is acceptable, such as photographs on a blog post. The degree of compression can be adjusted, but excessive compression can lead to visible artifacts. Lossless compression, conversely, preserves all the original data, ensuring no loss of image quality. This is ideal for images where quality is paramount, such as logos or graphics with transparency. However, lossless compression typically results in larger file sizes compared to lossy compression. Tools like TinyPNG or ImageOptim can help achieve effective compression.
Using Elementor’s Image Optimization Features (Lazy Loading, Responsive Images)
Elementor provides built-in features to further optimize images for web performance. Lazy loading defers the loading of images that are not immediately visible in the viewport, improving initial page load time. Images are only loaded when the user scrolls down and they come into view. Enable lazy loading within Elementor’s settings to reduce the initial page weight. Responsive images serve different image sizes based on the user’s device and screen resolution. Elementor automatically generates multiple image sizes when you upload an image, ensuring that users on mobile devices receive smaller, optimized images. Properly implementing responsive images prevents unnecessarily large images from being delivered to mobile users, saving bandwidth and improving loading speed. Remember to check how your images are displayed on a range of devices to ensure they’re optimized.
Step 2: Leverage Browser Caching for Faster Repeat Visits
Understanding Browser Caching and How It Works
Browser caching is a technique that allows web browsers to store static assets (such as images, CSS files, and JavaScript files) locally on a user’s computer. When the user revisits the website, the browser can retrieve these assets from its local cache instead of downloading them again from the server. This significantly reduces loading times for repeat visitors and decreases the load on your server. A user’s initial visit may take longer but subsequent visits will be considerably faster. By leveraging browser caching, you create a smoother and more responsive experience for returning visitors. You can learn more about how browsers use cache on the Mozilla Developer Network.
Configuring Browser Caching with .htaccess or a Caching Plugin
You can configure browser caching using two primary methods: directly through your .htaccess file (for Apache servers) or by using a caching plugin. Modifying the .htaccess file offers more control but requires technical knowledge. You need to add specific code snippets to set cache expiration headers for different file types. A caching plugin, such as WP Rocket or W3 Total Cache, simplifies the process by providing a user-friendly interface to configure caching settings. These plugins often offer additional features like page caching and database optimization. Choose the method that aligns with your technical skills and website needs. Some plugins handle many optimization tasks, streamlining your workflow.
Setting Appropriate Cache Expiration Times
Cache expiration times determine how long a browser should store cached assets. Setting appropriate expiration times is crucial for balancing performance and ensuring users receive the latest content. For static assets like images and CSS files that rarely change, you can set longer expiration times (e.g., several months or even a year). For dynamic content that updates more frequently, shorter expiration times are more suitable (e.g., a few hours or days). Incorrectly configuring expiration times can lead to users seeing outdated content or unnecessary re-downloads. Consider using a Content Delivery Network (CDN) in conjunction with browser caching for enhanced performance. A CDN distributes your website’s assets across multiple servers geographically, ensuring faster delivery to users worldwide.
Step 3: Minify CSS and JavaScript Files to Reduce File Size
Why Minification Matters: Removing Unnecessary Characters
Minification is the process of removing unnecessary characters from CSS and JavaScript files, such as whitespace, comments, and line breaks, without altering the code’s functionality. This significantly reduces file sizes, leading to faster download times and improved page loading speed. While these characters improve readability for developers, they are not required for the browser to execute the code. By removing them, you can shrink the file size by 10-20% or more. Minification is a simple but effective technique for optimizing website performance. Compressing files further with Gzip or Brotli can yield even more improvements.
Using Plugins for CSS and JavaScript Minification (Autoptimize, WP Rocket)
Several plugins can automate the process of CSS and JavaScript minification. Autoptimize is a popular free plugin that provides comprehensive optimization features, including minification, concatenation (combining multiple files into one), and caching. WP Rocket is a premium plugin that offers a wider range of features, including advanced caching, preloading, and database optimization, in addition to minification. When choosing a plugin, consider your website’s specific needs and budget. Many caching plugins include this feature and offer better performance, but you need to test carefully to avoid issues. Remember to test your website thoroughly after enabling minification to ensure that no functionality is broken.
Avoiding Common Pitfalls with Minification (Breaking Your Website)
While minification is generally safe, it can sometimes lead to unexpected issues, particularly if your theme or plugins have poorly written code. One common pitfall is breaking website functionality due to aggressive minification or conflicts with other plugins. Before enabling minification, it’s crucial to back up your website. After enabling it, thoroughly test all pages and features to ensure everything is working as expected. If you encounter any problems, disable minification immediately and investigate the cause. Sometimes, excluding specific files from minification can resolve conflicts. For example, if your custom theme has a problem, you may need to exclude your theme’s custom CSS file. Alternatively, contact the plugin developer for support. Always check Elementor CSS settings to confirm the minification isn’t overwriting styling.
Step 4: Choose a Performance-Optimized WordPress Hosting Provider
Shared Hosting vs. VPS vs. Managed WordPress Hosting
Your choice of WordPress hosting significantly impacts your website’s loading speed. Shared hosting, while the most affordable option, often suffers from performance bottlenecks due to resource limitations and shared server environments. This means your website’s speed can be affected by the activity of other websites on the same server. A Virtual Private Server (VPS) offers more dedicated resources and better performance than shared hosting. With VPS hosting, you share the physical server with others, but each user gets their own allocated resources, leading to more consistent performance. Managed WordPress hosting provides the best performance and support, but also comes at a higher price point. These providers specialize in WordPress and optimize their servers specifically for the platform.
The decision criteria for selecting the right hosting depend on your website’s traffic volume, technical expertise, and budget. If you’re just starting out with a low-traffic website, shared hosting might be sufficient initially. However, as your website grows and traffic increases, you’ll likely need to upgrade to a VPS or managed WordPress hosting to maintain optimal performance. Managed WordPress hosting is ideal if you want a hassle-free experience with automatic updates, backups, and security features. A potential pitfall is overspending on a hosting plan that’s beyond your current needs. It’s wiser to start with a smaller plan and scale up as your website grows.
Key Hosting Features to Look For: SSD Storage, CDN Integration, Server Location
When choosing a hosting provider, prioritize features that directly impact website speed. SSD (Solid State Drive) storage is significantly faster than traditional HDD (Hard Disk Drive) storage, resulting in quicker data access and improved loading times. Ensure your hosting provider offers SSD storage for both your website files and database. CDN (Content Delivery Network) integration allows you to distribute your website’s content across multiple servers worldwide, reducing latency for users in different geographic locations. Look for hosting providers that offer built-in CDN integration or easy integration with popular CDN services like Cloudflare. Server location is another crucial factor. Choose a hosting provider with servers located close to your target audience to minimize data transfer times.
For instance, if your primary audience is in North America, select a hosting provider with servers in the US or Canada. Furthermore, review server specifications like the type of processor, amount of RAM, and network bandwidth offered by the hosting provider. These specs influence the server’s ability to handle traffic surges. Consider hosting providers that provide tools for monitoring server performance and resource usage. These tools can help you identify and resolve any potential performance bottlenecks. A pitfall is ignoring the server’s uptime guarantee. A reliable hosting provider should offer at least a 99.9% uptime guarantee.
Examples of Hosting Providers Optimized for Elementor
Several hosting providers specialize in providing optimized environments for WordPress and Elementor. Examples include SiteGround, which offers optimized servers, caching solutions, and staging environments specifically for Elementor. Another popular option is WP Engine, a managed WordPress hosting provider known for its robust infrastructure and excellent support. Cloudways is another excellent choice, offering a flexible platform with multiple cloud providers (like DigitalOcean, Vultr, and AWS) and optimized server configurations for WordPress and Elementor. Kinsta is another premium managed WordPress hosting provider, known for its speed, security, and scalability. Always check independent reviews and compare features to find the best fit for your specific needs and budget. Remember to check for customer reviews and compare their specific features against your needs before committing to a provider.
Step 5: Deactivate or Replace Performance-Hogging Plugins
Identifying Plugins That Slow Down Your Website (Using Query Monitor)
Plugins can significantly enhance your website’s functionality, but they can also contribute to performance issues if not managed properly. One of the best ways to identify performance-hogging plugins is by using the Query Monitor plugin. Query Monitor is a free developer tool that allows you to analyze database queries, hooks, functions, and other performance metrics. By using Query Monitor, you can pinpoint exactly which plugins are causing slow database queries or consuming excessive resources. After installing and activating Query Monitor, navigate to different pages on your website and observe the query times and resource usage for each plugin. Plugins with high query times or resource usage are potential candidates for deactivation or replacement.
To use Query Monitor effectively, it’s crucial to understand how to interpret the data it provides. Pay attention to the “Queries” section, which shows the number of database queries executed by each plugin. Also, check the “Slow Queries” section to identify queries that are taking a long time to execute. This could indicate inefficient code or database design within the plugin. The “Hooks” section shows which plugins are using WordPress hooks excessively, which can also impact performance. Consider using the “Conditional Tags” feature to identify plugins that are loading unnecessary code on specific pages. A potential pitfall is misinterpreting the data and wrongly deactivating a critical plugin. Always test your website thoroughly after deactivating or replacing any plugin.
Finding Lightweight Alternatives to Resource-Intensive Plugins
Once you’ve identified plugins that are slowing down your website, the next step is to find lightweight alternatives. Before deactivating a plugin, research alternative plugins that offer similar functionality with better performance. For example, if you’re using a heavy social sharing plugin, consider switching to a lightweight alternative like Social Warfare (if you’re willing to pay) or a simpler, custom-coded solution. When evaluating alternative plugins, look for reviews and performance benchmarks from other users. Check the plugin’s code quality and update frequency. A well-maintained plugin is more likely to be optimized for performance and security. Also, consider whether you need all the features offered by a particular plugin. Often, simpler plugins with fewer features can provide the core functionality you need without the added overhead. For instance, instead of using a feature-rich all-in-one SEO plugin, you might consider using a dedicated SEO plugin like Yoast SEO along with separate plugins for other features like schema markup. Before completely replacing a plugin, test its functionality on a staging site.
The Importance of Regularly Auditing Your Plugin List
Regularly auditing your plugin list is crucial for maintaining optimal website performance. Over time, you might accumulate plugins that are no longer needed or that have become outdated. These unused or outdated plugins can pose security risks and contribute to performance issues. Schedule a regular plugin audit (e.g., quarterly or annually) to review your plugin list and identify plugins that can be safely deactivated or replaced. Deactivate and delete any plugins that you are no longer using. Update all remaining plugins to the latest versions to ensure that they have the latest security patches and performance improvements. Consider using a plugin management tool to help you keep track of your plugins and their update status. A potential pitfall is neglecting plugin updates. Outdated plugins are a major security vulnerability and can severely impact website performance. Regularly auditing your plugin list will also free up valuable resources, such as database space and server memory, contributing to faster loading times.
Bonus Tip: Implement Lazy Loading for Images and Videos
How Lazy Loading Improves Initial Page Load Time
Lazy loading is a technique that defers the loading of images and videos until they are about to enter the viewport. This means that only the images and videos that are visible on the screen are loaded initially, while the rest are loaded as the user scrolls down the page. By implementing lazy loading, you can significantly reduce the initial page load time, especially for pages with many images or videos. Faster initial load times improve user experience and can positively impact your website’s search engine ranking. When a user lands on a page, they see the content quicker, improving engagement and reducing bounce rates. Lazy loading prioritizes what is seen first. For a technical explanation of lazy loading, refer to Google’s Web.dev guide on lazy loading.
Enabling Lazy Loading in Elementor and WordPress
WordPress 5.5 and later versions include native lazy loading for images, which means that you don’t need a separate plugin to enable basic lazy loading functionality. To ensure that native lazy loading is enabled, go to your WordPress dashboard, navigate to “Settings” -> “Media”, and make sure the option to “Load images lazily” is checked. For Elementor users, lazy loading is often enabled by default in the Elementor settings. To check this, go to “Elementor” -> “Settings” -> “Advanced” and ensure that “Lazy Load Background Images” is enabled. You can also use third-party plugins like Smush or ShortPixel Adaptive Images for more advanced lazy loading options and image optimization features. These plugins offer features like automatic image resizing, WebP conversion, and CDN integration. For example, the Elementor Image Optimization post covers this more in-depth.
Lazy Loading Videos and Embedded Content
In addition to images, you can also lazy load videos and embedded content, such as YouTube videos and social media embeds. Lazy loading videos can significantly improve page load times, especially if you have multiple videos on a single page. You can use plugins like Lazy Load by WP Rocket or a3 Lazy Load to lazy load videos and embedded content. These plugins automatically replace the video or embed with a placeholder image until the user interacts with it. When choosing a lazy loading plugin, make sure it’s compatible with your WordPress theme and other plugins. Also, test the plugin thoroughly to ensure that it’s working correctly and not causing any conflicts. Ensure that the lazy loading plugin you use is compatible with various video platforms like YouTube, Vimeo, and Wistia. Many modern WordPress themes now include built-in lazy loading capabilities, which can simplify the process.
Utilizing a Content Delivery Network (CDN) for Global Speed
Understanding CDNs and How They Work
A Content Delivery Network (CDN) is a geographically distributed network of servers that cache and deliver your website’s static content (images, CSS, JavaScript) to users based on their location. When a user visits your website, the CDN server closest to them delivers the content, reducing latency and improving loading speed. CDNs work by caching your website’s static assets on multiple servers around the world. When a user requests a file, the CDN automatically routes the request to the nearest server, resulting in faster download speeds. This is particularly beneficial for websites with a global audience, as it ensures that users in different geographic locations experience similar loading speeds. Using a CDN offers additional benefits such as reduced server load, improved website security, and increased website availability.
Integrating a CDN with Your WordPress Website
Integrating a CDN with your WordPress website is relatively straightforward. The first step is to choose a CDN provider. Popular options include Cloudflare, StackPath, Bunny CDN, and Amazon CloudFront. Once you’ve chosen a CDN provider, you’ll need to create an account and configure your website to use the CDN. Most CDN providers offer plugins or integrations that simplify the setup process. For example, Cloudflare offers a free WordPress plugin that automatically configures your website to use its CDN. Once the CDN is configured, it will automatically cache your website’s static assets and deliver them to users from the nearest server. Test your website thoroughly after integrating the CDN to ensure that everything is working correctly.
Free vs. Paid CDN Options
Both free and paid CDN options are available, each with its own advantages and disadvantages. Free CDNs, like Cloudflare’s free plan, are a great option for websites with limited budgets. However, free CDNs often have limitations on bandwidth, features, and support. Paid CDNs, on the other hand, offer more bandwidth, advanced features, and better support. They also typically offer more control over caching and configuration. The best option for you depends on your website’s traffic volume, technical requirements, and budget. If you’re just starting out with a low-traffic website, a free CDN might be sufficient. However, as your website grows and traffic increases, you’ll likely need to upgrade to a paid CDN to meet your performance and scalability needs. Carefully evaluate the features and limitations of each option before making a decision. For websites that target a global audience, a paid CDN solution is generally a worthwhile investment.
Measuring Your Website Speed Before and After Optimization
Using Google PageSpeed Insights, GTmetrix, and WebPageTest
Before diving into optimization, it’s crucial to establish a baseline. Several tools can help you measure your website’s loading speed. Google PageSpeed Insights is a free tool that analyzes your page’s speed and provides actionable recommendations. It gives separate scores for mobile and desktop, highlighting areas for improvement in both. GTmetrix offers detailed performance reports, including waterfall charts, which visually represent the loading sequence of your website’s resources. This helps identify bottlenecks. WebPageTest provides advanced testing options, allowing you to simulate different browsers, devices, and network conditions. Use these tools to gain a comprehensive understanding of your website’s current performance.
When choosing a tool, consider your specific needs. PageSpeed Insights is excellent for a quick overview and aligns well with Google’s ranking factors. GTmetrix offers deeper technical insights. WebPageTest provides the most customization for advanced testing scenarios. Regularly testing your website’s speed can reveal if recent changes have impacted performance, allowing you to quickly address any issues. Understanding how these tools work will also help you better interpret the results.
Setting Performance Goals and Tracking Progress
Once you’ve established a baseline, set realistic performance goals. A good starting point is aiming for a page load time of under three seconds, especially for mobile devices. Define specific metrics you want to improve, such as reducing the “Largest Contentful Paint” (LCP) or “First Input Delay” (FID). Use a spreadsheet or project management tool to track your progress over time. Note the initial scores from your chosen speed testing tools, and then record the scores after each optimization step. This will help you assess the effectiveness of your efforts.
Be aware that external factors, like server performance or third-party scripts, can influence your website’s speed. Therefore, it’s best practice to run tests multiple times and under consistent conditions to get a more reliable average. Regularly monitoring your site’s performance also allows you to identify and address any performance regressions introduced by plugin updates or content changes. Remember that consistent monitoring is key to maintaining a fast-loading website.
Analyzing Your Speed Test Results
Understanding the data provided by speed testing tools is essential for effective optimization. PageSpeed Insights, for example, highlights opportunities like “Eliminate render-blocking resources” or “Properly size images.” GTmetrix offers detailed waterfall charts, revealing which resources are taking the longest to load. These charts can help you identify problematic images, scripts, or stylesheets that need optimization. Pay close attention to the “Time to First Byte” (TTFB), which indicates your server’s responsiveness. A high TTFB suggests server-side issues that need to be addressed.
The recommendations provided by these tools are not always straightforward, and prioritizing can be challenging. Start with the issues that have the biggest impact on your score. Addressing render-blocking resources, optimizing images, and leveraging browser caching are often good starting points. Remember that perfect scores are not always achievable or necessary. Focus on making meaningful improvements that provide a tangible benefit to your users. Furthermore, understand the weight of each metric, and prioritize based on impact.
Common Mistakes to Avoid When Optimizing Elementor Speed
Ignoring Mobile Optimization
In 2026, mobile optimization is non-negotiable. A large percentage of website traffic comes from mobile devices, and Google prioritizes mobile-first indexing. Ignoring mobile optimization will negatively impact your website’s ranking and user experience. Ensure your Elementor website is fully responsive and loads quickly on mobile devices. Use mobile-specific caching plugins and consider using Accelerated Mobile Pages (AMP) for your blog content. Always test your website on various mobile devices and screen sizes to identify and address any issues.
One common mistake is loading desktop-sized images on mobile devices, which unnecessarily consumes bandwidth and slows down loading times. Implement responsive images using the `srcset` attribute in HTML, or utilize Elementor’s built-in responsive options to serve appropriately sized images for different devices. Similarly, avoid using complex animations or effects on mobile devices, as they can strain device resources and lead to a poor user experience. Mobile optimization is not merely shrinking elements; it is about creating a tailored experience. An Elementor: Website Accessibility Checklist for Developers can also help you deliver a seamless experience across devices.
Overusing Animations and Effects
Elementor offers a wide range of animations and effects, but overusing them can significantly impact your website’s performance. While subtle animations can enhance the user experience, excessive or poorly implemented animations can slow down page load times and create a jarring experience. Use animations sparingly and only when they serve a clear purpose. For example, a subtle fade-in animation on a heading can draw attention, but a complex parallax effect on every section will likely degrade performance.
When using animations, ensure they are optimized for performance. Avoid using CPU-intensive animations, such as constantly looping animations or animations that involve complex calculations. Instead, opt for CSS-based animations, which are generally more performant than JavaScript-based animations. Consider using Elementor’s built-in animation options, as they are typically optimized for performance. Remember that less is often more when it comes to animations. Use CSS animation libraries consciously, and audit any performance impact.
Failing to Update WordPress, Elementor, and Plugins
Outdated software is a major security risk and can also negatively impact your website’s performance. Regularly updating WordPress, Elementor, and your plugins is crucial for maintaining a secure and fast-loading website. Updates often include performance improvements, bug fixes, and security patches. Failing to update your software can leave your website vulnerable to attacks and slow down its performance. Before updating, always create a backup of your website to prevent data loss in case something goes wrong. Consider using a staging environment to test updates before applying them to your live website. Regular maintenance is an investment in your website’s longevity and performance, a critical factor when building an Elementor membership website.
Make sure your web hosting meets or exceeds the minimum requirements for WordPress and Elementor. Using a reliable hosting provider with sufficient resources can significantly improve your website’s performance. Avoid using outdated versions of PHP, as they can slow down your website. Use a caching plugin to improve loading speeds. Keep everything updated to the latest versions. Ignoring updates not only hinders performance but also exposes your site to security vulnerabilities.
CopyElement Components: Built for Speed and Performance
How CopyElement’s Pre-built Elements Contribute to Faster Loading Times
CopyElement is designed with performance in mind. Our pre-built elements are optimized to load quickly and efficiently, contributing to faster loading times for your Elementor websites. We achieve this through several techniques, including optimized code, minimal dependencies, and lazy loading of images and other assets. Our components are also designed to be modular, allowing you to use only the elements you need, reducing the overall size of your website.
Our team carefully crafts each component to minimize its impact on your website’s performance. This includes using efficient CSS and JavaScript code, optimizing images for the web, and minimizing the number of HTTP requests required to load the element. By using CopyElement’s pre-built elements, you can avoid the performance bottlenecks associated with building components from scratch. We handle the performance optimization, so you can focus on designing and building your website. CopyElement components are also built with SEO in mind, with clean code and semantic HTML that is easily understood by search engines. If you need assistance with the visual aspects, consider exploring Elementor + AI: Generate Stunning Website Mockups Faster, as it could help streamline the design process.
Example of Performance-Optimized Sections & Widgets within CopyElement
Example: Imagine you’re building a landing page using Elementor. Instead of creating a complex hero section from scratch, you use a CopyElement pre-built hero section. This section has been optimized for performance, with properly sized images, lazy loading enabled, and minimal CSS and JavaScript code. The result is a hero section that loads quickly and doesn’t negatively impact your website’s overall performance.
Another example is a testimonial slider. Instead of using a generic slider plugin, you use a CopyElement pre-built testimonial slider. This slider has been optimized to load only the visible testimonials, and lazy loads the remaining testimonials as the user scrolls through the slider. This significantly reduces the initial page load time. Let’s say a typical website experiences a 2-second improvement on initial load time and a 15% reduction in bounce rate after implementing CopyElement’s performance-optimized sections. These seemingly small improvements accumulate to result in a more engaging and efficient user experience. CopyElement’s optimized components are a crucial component for building a high-performance website.
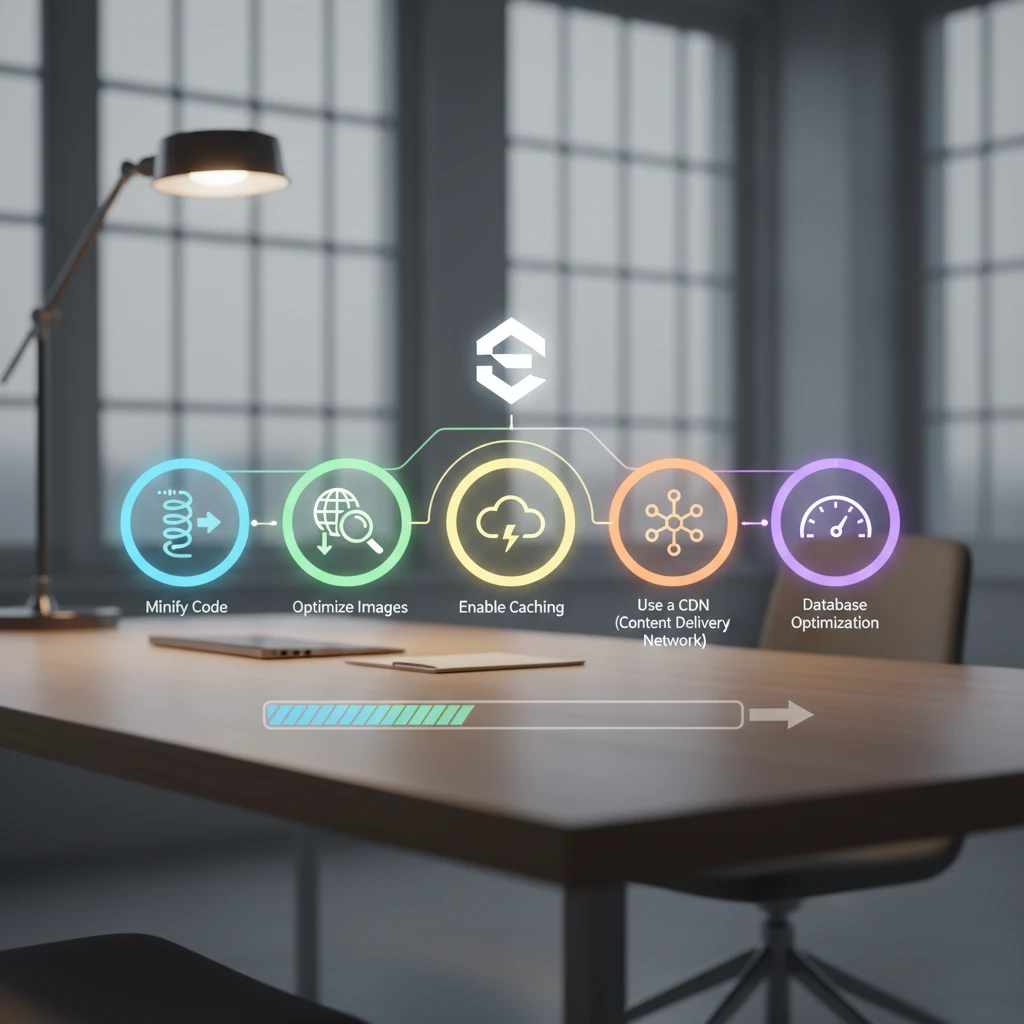
Take Action Today: A Checklist for Faster Elementor Websites in 2026
A Step-by-Step Checklist for Implementing These Optimization Techniques
- Benchmark Your Current Speed: Use Google PageSpeed Insights, GTmetrix, and WebPageTest to get baseline scores.
- Optimize Images: Compress and resize images using tools like TinyPNG or ShortPixel. Implement lazy loading.
- Enable Caching: Install and configure a caching plugin like WP Rocket or LiteSpeed Cache.
- Minify CSS and JavaScript: Use a plugin like Autoptimize to minify your code.
- Optimize Your Database: Clean up your database using a plugin like WP-Optimize.
- Review and Reduce Plugins: Deactivate and delete unnecessary plugins.
- Enable Gzip Compression: Ensure Gzip compression is enabled on your server.
- Use a CDN: Consider using a Content Delivery Network (CDN) to distribute your website’s assets.
- Optimize for Mobile: Ensure your website is fully responsive and mobile-friendly.
- Test and Monitor: Regularly test your website’s speed and monitor its performance.
Resources and Further Reading for Website Speed Optimization
There are numerous resources available to help you further optimize your website’s speed. Google’s Web.dev provides comprehensive guides and best practices for web performance. GTmetrix offers a detailed blog with articles and tutorials on website optimization. WP Rocket’s blog provides valuable insights and tips for WordPress speed optimization. Consult these resources to stay up-to-date on the latest best practices and techniques.
Remember that website speed optimization is an ongoing process. Continuously monitor your website’s performance and adapt your strategies as needed. By following the steps outlined in this article and leveraging the resources mentioned above, you can significantly improve your website’s loading speed and provide a better experience for your users. Focusing on key areas such as image optimization, caching, and code minification yields the most significant improvements for WordPress and Elementor-based sites.