
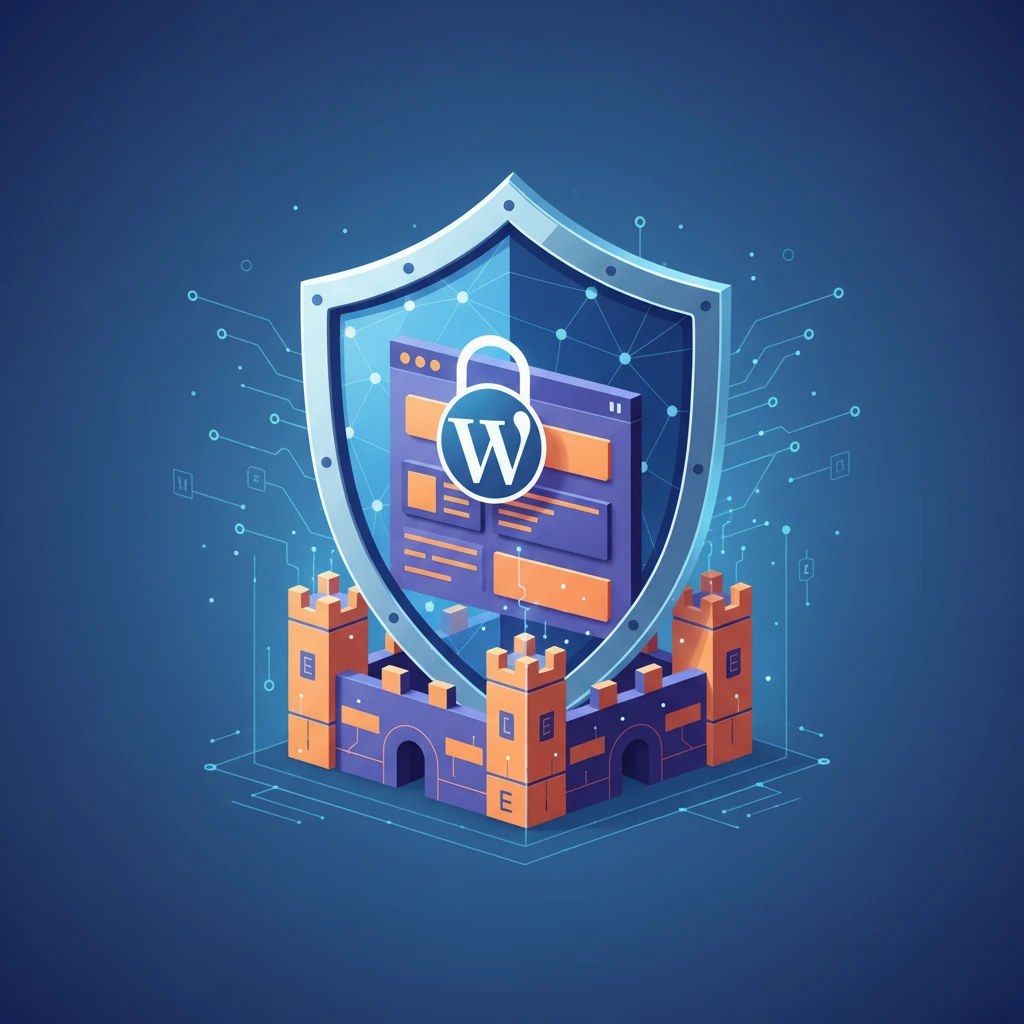
Elementor has revolutionized WordPress web design, making it easier than ever to create stunning and dynamic websites. However, this ease of use and flexibility can sometimes come at a cost if security isn’t prioritized. While Elementor itself is generally secure, the way it’s implemented, along with the use of third-party add-ons and the overall WordPress environment, can introduce vulnerabilities if not properly managed. This article provides a comprehensive guide to hardening your Elementor website, ensuring it remains safe from common threats and attacks.
By taking proactive steps and understanding the potential risks, you can significantly reduce the likelihood of your Elementor website being compromised. This guide delves into crucial WordPress security measures, Elementor-specific best practices, and common vulnerabilities, equipping you with the knowledge to build a robust and secure online presence.
Why Elementor Websites Need Enhanced Security (Even More Than Regular WordPress Sites)
The Rising Threat: Elementor-Specific Exploits and Vulnerabilities
The popularity of Elementor makes it a prime target for malicious actors. As more websites rely on Elementor, attackers dedicate resources to finding and exploiting vulnerabilities within the plugin itself and its ecosystem of add-ons. Staying informed about the latest Elementor-specific threats is crucial. News of security flaws often spreads rapidly within the WordPress community, but you need to actively seek out reliable sources of information such as the Elementor changelog, security blogs, and WordPress security forums. This will allow you to quickly patch any issues that arise. Failure to address these vulnerabilities promptly can result in website defacement, data breaches, or even complete site takeover.
Complexity as a Factor: How Elementor’s Features Can Introduce Security Risks
Elementor’s extensive feature set, including dynamic content, custom fields, and integrations with third-party services, can inadvertently introduce security risks. Each new feature adds another layer of complexity, potentially increasing the attack surface. For instance, relying heavily on third-party Elementor add-ons without carefully vetting their security practices can leave your site vulnerable. Always research the reputation and security record of any add-on before installing it, paying close attention to user reviews and developer responsiveness to reported issues. Regularly audit your Elementor configuration to identify and disable any unused or unnecessary features that could be exploited.
Understanding the False Sense of Security: “I’m using Elementor, I’m safe!”
Many website owners mistakenly believe that simply using Elementor automatically ensures security. While Elementor’s developers actively work to maintain the plugin’s security, it’s crucial to recognize that Elementor is just one piece of the puzzle. Security is a holistic process that requires a multi-layered approach. Relying solely on Elementor’s built-in security features without implementing broader WordPress security best practices is akin to locking your front door but leaving the windows wide open. You must secure the underlying WordPress installation, choose a reputable hosting provider, and actively monitor your site for suspicious activity to achieve true security.
Essential WordPress Security Hardening Steps (Before Even Touching Elementor)
Choosing a Secure Hosting Provider: Key Features to Look For
Your hosting provider forms the foundation of your website’s security. Opt for a provider that offers robust security features, such as server-level firewalls, malware scanning, and intrusion detection systems. Automatic WordPress updates, managed backups, and proactive security patching are also essential. Consider providers specializing in WordPress hosting, as they often have security measures specifically tailored to WordPress websites. Decision criteria should include uptime guarantees, customer support responsiveness in case of security incidents, and compliance with relevant security standards. A provider with a poor security track record can expose your site to countless vulnerabilities, regardless of how well you’ve configured Elementor.
The Importance of Strong Passwords and User Permissions
Weak passwords and improper user permissions are a leading cause of WordPress security breaches. Enforce strong password policies for all user accounts, requiring a mix of uppercase and lowercase letters, numbers, and symbols. Regularly review user roles and permissions, granting only the necessary access levels. Avoid using the default “admin” username, as it’s a common target for brute-force attacks. Implement a password management system to help users create and store strong, unique passwords. Remove any inactive or unnecessary user accounts promptly to minimize potential entry points for attackers.
Keeping WordPress Core, Themes, and Plugins Up-to-Date (And Why Delaying is Risky)
Outdated software is a major security risk. Regularly update WordPress core, your theme, and all plugins, including Elementor and its add-ons. These updates often contain critical security patches that address newly discovered vulnerabilities. Delaying updates can leave your site exposed to known exploits that attackers can easily leverage. Enable automatic updates for minor WordPress releases to ensure you’re always running the latest stable version. Before updating major releases, create a backup of your website to prevent data loss in case of compatibility issues. Also, consider using a staging environment to test updates before deploying them to your live site.
Implementing Two-Factor Authentication (2FA) for All User Accounts
Two-factor authentication (2FA) adds an extra layer of security to your WordPress login process. Even if an attacker manages to obtain a user’s password, they’ll still need a second factor, such as a code from their mobile device, to gain access. Implement 2FA for all user accounts, especially those with administrative privileges. Several WordPress plugins offer 2FA functionality, making it easy to set up and configure. Encourage all users to enable 2FA on their accounts and provide clear instructions on how to do so. 2FA significantly reduces the risk of unauthorized access and can prevent a wide range of attacks.
Securing Your Elementor Installation: Best Practices
Restricting Access to the Elementor Editor: Who Really Needs It?
Granting unrestricted access to the Elementor editor can be a significant security risk, especially if you have multiple users with varying levels of technical expertise. Limit access to the Elementor editor to only those users who absolutely need it for content creation and website maintenance. Use WordPress’s built-in user roles and permissions to control who can edit Elementor templates, widgets, and settings. Regularly review user access levels and revoke privileges when they are no longer needed. For example, a content writer may need access to edit text content but not to modify the website’s design or layout.
Disabling Unnecessary Elementor Features: Reducing the Attack Surface
Elementor comes with a wide range of features, some of which you may not be actively using on your website. Disabling unnecessary features can significantly reduce your attack surface and minimize the potential for vulnerabilities. For example, if you’re not using Elementor’s custom CSS feature, consider disabling it to prevent attackers from injecting malicious code. Similarly, if you don’t need Elementor’s integration with certain third-party services, disable those integrations to eliminate potential attack vectors. Regularly audit your Elementor configuration and disable any features that are not essential for your website’s functionality. This approach aligns with the principle of least privilege, granting access only to what’s necessary.
Using a Security Plugin Specifically Optimized for Elementor
While general WordPress security plugins offer valuable protection, consider using a security plugin specifically optimized for Elementor. These plugins are designed to address Elementor-specific vulnerabilities and provide enhanced security features tailored to the Elementor environment. These can help address security concerns outlined in other articles, such as essential Elementor security practices. These plugins may include features such as Elementor template scanning, widget vulnerability detection, and protection against cross-site scripting (XSS) attacks. Research different Elementor security plugins and choose one that aligns with your specific security needs and budget. Ensure the plugin is actively maintained and regularly updated to address the latest threats.
Common Elementor Security Vulnerabilities and How to Prevent Them
Cross-Site Scripting (XSS) Attacks through Elementor Forms: Input Validation is Key
Elementor forms are a common target for cross-site scripting (XSS) attacks. XSS attacks occur when an attacker injects malicious JavaScript code into your website through form inputs. This code can then be executed by other users who visit your site, potentially stealing their cookies, redirecting them to malicious websites, or defacing your website. To prevent XSS attacks, it’s crucial to implement robust input validation on all Elementor form fields. Sanitize user input to remove or escape any potentially harmful characters, such as HTML tags or JavaScript code. Use WordPress’s built-in sanitization functions or a dedicated security plugin to perform input validation. Regularly test your forms for XSS vulnerabilities to ensure they are properly protected.
SQL Injection Risks in Custom Elementor Widgets: Sanitization and Parameterized Queries
If you’re using custom Elementor widgets that interact with your website’s database, you’re potentially vulnerable to SQL injection attacks. SQL injection attacks occur when an attacker injects malicious SQL code into your database queries, allowing them to access, modify, or delete sensitive data. To prevent SQL injection attacks, always use parameterized queries or prepared statements when interacting with your database. Parameterized queries separate the SQL code from the data, preventing attackers from injecting malicious code. Never directly concatenate user input into your SQL queries. Sanitize user input to remove or escape any potentially harmful characters. Regularly review your custom widgets for SQL injection vulnerabilities and update them as needed.
File Upload Vulnerabilities: Limiting File Types and Locations
Elementor’s file upload functionality can be a potential security risk if not properly configured. Allowing users to upload arbitrary files to your website can create opportunities for attackers to upload malicious code, such as PHP scripts, that can be executed on your server. To mitigate this risk, restrict the types of files that users can upload. Only allow necessary file types, such as images, documents, or videos. Implement file type validation to ensure that uploaded files match the allowed types. Store uploaded files in a secure location outside of your website’s document root. Limit access to the upload directory to prevent unauthorized access. Regularly scan uploaded files for malware to detect and remove any potentially harmful files. For example, you might allow only `.jpg`, `.png`, and `.pdf` uploads to a specific `/uploads/` directory, and implement a virus scan on each uploaded file. Cloud security measures can also help protect uploaded data.
Implementing a Web Application Firewall (WAF) for Elementor
Understanding the Role of a WAF in Protecting Your Elementor Website
A Web Application Firewall (WAF) acts as a protective shield between your Elementor website and the internet, meticulously inspecting incoming HTTP traffic. Unlike a traditional firewall that focuses on network-level security, a WAF analyzes the application layer (layer 7) where web applications like WordPress and Elementor operate. Its primary purpose is to identify and block malicious requests, such as SQL injection attempts, cross-site scripting (XSS) attacks, and other common web application vulnerabilities. By preventing these attacks, a WAF significantly reduces the risk of data breaches, website defacement, and other security incidents.
For Elementor websites, a WAF is particularly crucial because Elementor’s flexibility can sometimes introduce security vulnerabilities if not configured and maintained properly. A WAF provides an additional layer of defense, safeguarding your site against exploits targeting WordPress plugins, themes, or even custom Elementor-built features. Without a WAF, your Elementor site is more susceptible to automated bot attacks and sophisticated hacking attempts that could compromise sensitive data or disrupt your online presence. Considering implementing a WAF as a core component of your overall Elementor website security strategy.
Choosing the Right WAF: Cloud-Based vs. Plugin-Based Options
When selecting a WAF for your Elementor website, you typically have two main choices: cloud-based WAFs and plugin-based WAFs. Cloud-based WAFs, such as Cloudflare or Sucuri, offer comprehensive protection by routing all website traffic through their servers. This allows them to analyze traffic before it even reaches your server, filtering out malicious requests in real-time. The key benefit of a cloud-based WAF is its ability to handle high traffic volumes and its generally superior performance due to its optimized infrastructure. They also offer broader protection, including DDoS mitigation. The downside is the ongoing subscription cost, which can vary depending on the level of protection you require.
Plugin-based WAFs, like Wordfence, are installed directly on your WordPress website. These plugins provide security scanning, firewall protection, and other security features from within your WordPress dashboard. Plugin-based WAFs are often more affordable than cloud-based solutions and offer tighter integration with WordPress. However, they can consume server resources and may impact website performance, especially on high-traffic sites. Furthermore, their effectiveness is limited to the scope of the plugin’s capabilities and configuration. When deciding, consider your technical expertise, budget, and the level of protection you need. If you need robust, enterprise-grade protection, a cloud-based WAF is generally the better option. For smaller websites with limited budgets, a plugin-based WAF can provide a reasonable level of security.
Configuring Your WAF for Optimal Elementor Security
Properly configuring your chosen WAF is paramount to maximizing its effectiveness in protecting your Elementor website. For cloud-based WAFs, this typically involves setting up DNS records to route traffic through the WAF’s servers and configuring security rules based on your specific needs. Ensure that the WAF is configured to block common attack vectors like SQL injection, XSS, and remote file inclusion (RFI) attacks. You should also customize the WAF’s settings to reflect your website’s traffic patterns and application behavior. This may involve whitelisting specific IP addresses or user agents that are known to be safe.
For plugin-based WAFs, the configuration process is usually managed through the WordPress dashboard. Regularly update the plugin to ensure that it has the latest security definitions and features. Scan your website regularly for vulnerabilities and configure the plugin’s firewall settings to block suspicious activity. Pay close attention to the WAF’s logs and alerts, and take immediate action to address any security incidents. Fine-tune the WAF’s sensitivity levels to minimize false positives (legitimate traffic being blocked) without compromising security. Remember to test your WAF configuration thoroughly after making changes to ensure that it is working as expected without disrupting your website’s functionality. Staying informed about the latest security threats and updating your WAF accordingly is an ongoing process.
Regular Security Scans and Monitoring: Staying Ahead of Threats
Choosing a Security Scanner for WordPress and Elementor
Selecting the right security scanner is crucial for identifying vulnerabilities in your WordPress and Elementor setup before they can be exploited. Numerous options exist, ranging from free plugins to premium, subscription-based services. Free scanners like Sucuri Security or Wordfence offer basic malware scanning and file integrity monitoring. Premium scanners such as MalCare or Jetpack Scan provide more advanced features, including automated malware removal, vulnerability detection, and website firewall integration. The choice depends on your budget, technical expertise, and the level of security you require.
When evaluating security scanners, consider factors such as the frequency of scans, the types of threats they can detect, the ease of use, and the quality of their reporting. Look for scanners that offer detailed reports with clear explanations of the vulnerabilities found and actionable recommendations for fixing them. Scanners that integrate with other security tools, such as web application firewalls (WAFs), can provide a more comprehensive security solution. Crucially, ensure the scanner is regularly updated with the latest threat definitions to accurately identify emerging vulnerabilities. Don’t forget to consider your server resources; some scanners can be resource-intensive, potentially impacting website performance.
Setting Up Automated Security Scans and Alerts
To effectively protect your Elementor website, automate security scans and configure alerts for immediate notifications of any detected issues. Most security scanners allow you to schedule regular scans, such as daily, weekly, or monthly, depending on your needs and the sensitivity of your data. Automating scans ensures that your website is continuously monitored for vulnerabilities, even when you’re not actively working on it. In addition to scheduling scans, configure alerts to be sent to your email or other notification channels whenever a security issue is detected. These alerts should include details about the type of threat, the affected files or pages, and the recommended actions to take.
Promptly addressing security alerts is critical to preventing potential breaches. Ignoring or delaying responses to alerts can give attackers more time to exploit vulnerabilities and compromise your website. Consider setting up different alert levels for different types of threats, with critical alerts triggering immediate action and lower-priority alerts being reviewed on a regular basis. Regularly review your security scanner’s logs and reports to identify patterns or trends that may indicate ongoing security threats. By automating scans and configuring alerts, you can proactively detect and respond to security issues, minimizing the risk of data breaches and website disruptions.
Interpreting Security Scan Results and Taking Action
Understanding security scan results is paramount to taking effective action. Security scanners typically provide reports detailing identified vulnerabilities, malware, and other security issues. Each entry in the report should include information about the type of threat, its location on your website, and its severity level. Pay close attention to vulnerabilities with high or critical severity, as these pose the greatest risk to your website. The report should also provide recommendations for fixing the identified issues, such as updating plugins, patching vulnerabilities, or removing malicious files. If you’re unsure how to interpret the scan results or implement the recommended fixes, consider seeking assistance from a security professional or your hosting provider’s support team.
After addressing the identified vulnerabilities, run another security scan to confirm that the issues have been resolved. Continue to monitor your website regularly for new threats and vulnerabilities, and promptly address any new issues that are detected. Maintaining a proactive approach to security is essential for protecting your Elementor website against evolving threats. Ensure that all plugins and themes are up-to-date, use strong passwords, and implement other security best practices. Remember that security is an ongoing process, not a one-time fix. A proactive defense and regular security checks are the best way to protect your work.
Backup and Disaster Recovery: Protecting Against Data Loss
Implementing a Reliable Backup Solution for Your Elementor Website
Implementing a robust backup solution is non-negotiable for any Elementor website. Data loss can occur due to various factors, including hacking attempts, server failures, software conflicts, or even accidental deletions. A reliable backup system ensures that you can quickly restore your website to a previous state in the event of a disaster, minimizing downtime and data loss. There are several backup solutions available for WordPress, ranging from free plugins like UpdraftPlus and BackWPup to premium services like BlogVault and BackupBuddy. Choose a solution that meets your specific needs and budget, considering factors such as ease of use, storage capacity, backup frequency, and restore capabilities.
When selecting a backup solution, prioritize features such as automated backups, incremental backups (which only back up changes made since the last backup), and offsite storage. Automated backups ensure that your website is backed up regularly without requiring manual intervention. Incremental backups save storage space and reduce backup times. Offsite storage protects your backups from being lost or corrupted if your server is compromised. Schedule backups to run automatically on a regular basis, such as daily or weekly, depending on the frequency of changes to your website. Testing the restore process is critical; don’t wait for a disaster to find out your backup doesn’t work. Ensure that your backup solution includes a simple and reliable restore process that allows you to quickly restore your website to a previous state with minimal disruption.
Storing Backups Securely: Offsite vs. Onsite Options
The location where you store your website backups is a critical security consideration. You have two primary options: onsite storage (on the same server as your website) and offsite storage (on a separate server or cloud-based storage service). Onsite storage is convenient and provides fast access to backups, but it also presents a significant risk: if your server is compromised, your backups may also be compromised or destroyed. Offsite storage, on the other hand, offers greater security and resilience by storing your backups in a separate location, away from your website’s server. This protects your backups from being affected by server failures, hacking attempts, or other disasters. Cloud storage services like Amazon S3, Google Cloud Storage, and Dropbox offer reliable and affordable offsite storage options.
When choosing a storage location, consider the trade-offs between convenience, cost, and security. Onsite storage may be suitable for small websites with limited budgets, but offsite storage is highly recommended for larger websites and those with sensitive data. If you choose offsite storage, ensure that your backups are encrypted to protect them from unauthorized access. Regularly test your backup and restore process to verify that your backups are stored correctly and can be restored successfully. Consider using a combination of onsite and offsite storage for added redundancy. By implementing a secure and reliable backup storage strategy, you can minimize the risk of data loss and ensure that you can quickly recover your website in the event of a disaster. For example, retain 30 days of daily backups offsite, and a full server snapshot onsite.
Testing Your Backup and Restore Process Regularly
The final, and often overlooked, step in a solid backup strategy is regular testing. Creating backups is useless if you can’t successfully restore your website when needed. Schedule regular tests of your backup and restore process to ensure that it works as expected. This involves restoring your website to a test environment and verifying that all files, databases, and configurations are restored correctly. Pay close attention to details such as plugin settings, theme customizations, and media files. Document the restore process step-by-step to ensure that anyone can restore your website in your absence.
During the testing process, identify any potential issues or bottlenecks in the restore process and take steps to address them. For example, you may need to adjust your backup settings, optimize your server configuration, or improve your documentation. Keep in mind that WordPress and Elementor are constantly evolving, so your backup and restore process may need to be updated periodically to accommodate these changes. By regularly testing your backup and restore process, you can identify and address any potential issues before they cause problems, ensuring that you can quickly recover your website in the event of a disaster. Don’t assume your backups work; verify it at least quarterly.
Securing Elementor Forms: CAPTCHA, Honeypots, and Rate Limiting
Implementing CAPTCHA or reCAPTCHA to Prevent Spam Submissions
Elementor forms are powerful tools for collecting information from website visitors, but they are also a common target for spammers. Implementing CAPTCHA (Completely Automated Public Turing test to tell Computers and Humans Apart) or reCAPTCHA is a simple yet effective way to prevent spam submissions. CAPTCHA presents users with a challenge that is easy for humans to solve but difficult for bots, such as identifying distorted text or images. ReCAPTCHA, developed by Google, uses advanced risk analysis techniques to distinguish between humans and bots, often without requiring users to solve a challenge. Elementor integrates seamlessly with both CAPTCHA and reCAPTCHA, allowing you to easily add them to your forms. When choosing between CAPTCHA and reCAPTCHA, consider the user experience. CAPTCHA challenges can be frustrating for users, while reCAPTCHA’s “invisible” challenge is less intrusive.
To implement CAPTCHA or reCAPTCHA in your Elementor forms, you will need to obtain API keys from the respective provider (Google for reCAPTCHA). Add these keys to the Elementor settings page and then enable CAPTCHA or reCAPTCHA for each form you want to protect. Customize the CAPTCHA settings to match your website’s design and user experience. Monitor your form submissions to ensure that CAPTCHA is effectively blocking spam. If you notice that spam submissions are still getting through, consider increasing the difficulty of the CAPTCHA challenge or implementing additional security measures. A well-designed Elementor form, coupled with robust spam protection, can significantly improve your website’s conversion rates and user experience.
Using Honeypot Fields to Catch Bots
Honeypot fields provide an additional layer of defense against spam bots by tricking them into filling out fields that are hidden from human users. A honeypot field is a form field that is intentionally left blank by legitimate users but is automatically filled in by bots. When a form is submitted with a value in the honeypot field, it indicates that the submission is likely from a bot and should be rejected. Honeypot fields are a simple and effective way to catch bots without requiring users to solve CAPTCHA challenges. They are particularly useful for forms that receive a high volume of spam submissions.
To implement a honeypot field in your Elementor form, add a new text field to the form and give it a descriptive name, such as “honeypot” or “spam_trap”. Use CSS to hide the field from human users. In the Elementor form settings, configure the form to reject submissions that have a value in the honeypot field. Monitor your form submissions to ensure that the honeypot field is effectively blocking spam. Adjust the honeypot field settings as needed to optimize its effectiveness. Combine honeypot fields with other spam prevention techniques, such as CAPTCHA and rate limiting, for a more comprehensive spam protection strategy.
Rate Limiting Form Submissions to Prevent Abuse
Rate limiting is a technique that limits the number of form submissions that can be made from a specific IP address or user within a given time period. This helps prevent abuse by bots or malicious users who may attempt to flood your forms with spam submissions. Rate limiting can be implemented at the server level or through WordPress plugins. Server-level rate limiting is more effective at preventing abuse but requires technical expertise to configure. Plugin-based rate limiting is easier to implement but may be less effective at preventing sophisticated attacks.
When configuring rate limiting, choose a submission limit and a time period that is appropriate for your website and form usage patterns. For example, you may want to limit submissions to 5 per minute per IP address. Monitor your form submissions to ensure that rate limiting is effectively preventing abuse. Adjust the rate limiting settings as needed to optimize its effectiveness without blocking legitimate users. Be cautious not to set the rate limit too low, as this can block legitimate users who may be submitting multiple forms in a short period of time. In combination with CAPTCHA and honeypot fields, rate limiting provides a robust defense against spam and abuse of your Elementor forms.
Content Security Policy (CSP) for Elementor: A Deeper Dive
Understanding Content Security Policy (CSP) and Its Benefits
Content Security Policy (CSP) is an added layer of security that helps to detect and mitigate certain types of attacks, including Cross Site Scripting (XSS) and data injection attacks. CSP essentially tells the browser which sources of content are trusted, and which are not. Without CSP, a browser will typically load any content linked from a page, even if that content originates from a malicious source. This creates a vulnerability that attackers can exploit to inject malicious scripts into your website, potentially stealing user data or defacing your site.
The primary benefit of implementing CSP is to significantly reduce the risk of XSS attacks. XSS attacks occur when malicious scripts are injected into your website code, typically through vulnerabilities in input fields or poorly sanitized data. These scripts can then execute in the browsers of your visitors, allowing attackers to steal cookies, redirect users to malicious sites, or even take control of their accounts. With a properly configured CSP, the browser will block any scripts originating from untrusted sources, effectively neutralizing the threat. Decision criteria for enabling CSP should involve assessing the risk of XSS attacks, which is generally high for any website that accepts user input or displays dynamic content. Pitfalls include overly restrictive policies that break site functionality or overly permissive policies that provide little security benefit.
Implementing CSP for Elementor to Prevent XSS Attacks
Implementing CSP involves defining a set of directives that specify the allowed sources for different types of content, such as scripts, stylesheets, images, and fonts. There are several ways to implement CSP in WordPress. One common method involves adding the Content-Security-Policy header to your website’s HTTP response. This can be done through your web server configuration (e.g., Apache’s .htaccess or Nginx’s virtual host file) or by using a WordPress plugin designed for security hardening. A recommended approach is to start with a “report-only” CSP. This allows you to monitor how the policy affects your website without actually blocking any content. To do this, you would use the Content-Security-Policy-Report-Only header. Examine the reports generated by the browser’s developer console to identify any violations and adjust your policy accordingly.
For Elementor websites, you need to ensure that your CSP allows Elementor’s own scripts and styles, as well as any scripts or styles used by your installed add-ons. For instance, if you are using Google Fonts, you need to allow fonts.googleapis.com and fonts.gstatic.com as valid font sources. Here’s an example of a basic CSP header for an Elementor site: Content-Security-Policy: default-src 'self'; script-src 'self' 'unsafe-inline' 'unsafe-eval' https://ajax.googleapis.com; style-src 'self' 'unsafe-inline' https://fonts.googleapis.com; font-src 'self' https://fonts.gstatic.com; img-src 'self' data:;. Note: 'unsafe-inline' and 'unsafe-eval' should be avoided where possible, as they weaken the CSP. An example might be that you use YouTube videos embedded. The `script-src` directive dictates where JavaScript can be loaded from. The `style-src` is similar but specifies styling sources. The `font-src` declares where to load fonts from, and the `img-src` specifies where images can be loaded from. Always consult the documentation of any third-party services or add-ons you use to determine the required CSP directives.
Testing and Refining Your CSP Configuration
After implementing CSP, thorough testing is crucial. Use your browser’s developer console to check for any CSP violation reports. These reports will indicate which resources are being blocked and why. It’s common to encounter issues with inline styles or scripts, especially if you’re using custom code snippets within Elementor. Refine your CSP by adding specific exceptions for these resources, or better yet, refactor your code to avoid inline styles and scripts altogether. Be mindful of the performance implications of CSP. Incorrectly configured policies can lead to slower page load times due to blocked resources. Regularly review your CSP configuration to ensure it remains effective and doesn’t interfere with legitimate website functionality. Consider using online tools to validate your CSP header syntax and identify potential weaknesses.
Monitoring User Activity and Audit Logging for Elementor Changes
Tracking User Logins, Logouts, and Failed Login Attempts
Monitoring user activity, particularly logins, logouts, and failed login attempts, is crucial for identifying suspicious behavior. A sudden surge in failed login attempts from a single IP address could indicate a brute-force attack. Similarly, monitoring successful logins can help you detect unauthorized access, especially if a login originates from an unusual location or device. While WordPress provides some basic login tracking, it often lacks the detailed information and reporting capabilities needed for effective security monitoring. Consider using a security plugin that provides comprehensive user activity logging. These plugins typically record the IP address, username, date, and time of each login, logout, and failed login attempt. Configure alerts to notify you of suspicious activity, such as multiple failed login attempts or logins from unfamiliar locations. Analyze login patterns to identify potential vulnerabilities, such as weak passwords or accounts that are frequently targeted by attackers. This data can inform your password policies and user training efforts. Decision criteria should include the sensitivity of the data on your website and the potential impact of unauthorized access. Pitfalls include generating excessive logs that are difficult to analyze or failing to configure alerts for critical events.
Logging Changes Made to Elementor Pages and Templates
In addition to monitoring user logins, it’s essential to track changes made to your Elementor pages and templates. This includes creating new pages, editing existing pages, deleting pages, and modifying template settings. Audit logs provide a record of who made each change, when it was made, and what specific modifications were performed. This information can be invaluable for troubleshooting issues, identifying unauthorized changes, and investigating security incidents. Elementor itself doesn’t provide built-in audit logging capabilities, so you’ll need to rely on a third-party plugin. Many security plugins offer audit logging features that track changes to various aspects of your WordPress website, including Elementor pages and templates. Configure the plugin to log all relevant changes, such as page edits, template updates, and user permission changes. Regularly review the audit logs to identify any unusual or suspicious activity. An example would be a user without admin privileges changing a template used on every page. This could signal a compromised account.
Using Audit Logs to Investigate Security Incidents
Audit logs are essential for investigating security incidents. When a security breach is suspected, the audit logs can provide valuable insights into the attacker’s actions and the extent of the damage. For example, if a website is defaced, the audit logs can reveal which user account was used to make the unauthorized changes and what specific modifications were performed. The logs can also help you identify the entry point used by the attacker, allowing you to patch the vulnerability and prevent future attacks. When investigating a security incident, start by reviewing the audit logs for any suspicious activity that occurred around the time of the incident. Look for unusual login attempts, unauthorized changes to pages or templates, and modifications to user permissions. Correlate the information in the audit logs with other security data, such as server logs and firewall logs, to get a comprehensive picture of the attack. Use the audit logs to identify the scope of the incident and determine what data was compromised. This will help you assess the impact of the breach and take appropriate steps to mitigate the damage. Always retain audit logs for a sufficient period, as required by compliance regulations and your organization’s security policies.
Best Practices for Choosing and Using Elementor Add-ons and Extensions
Researching Add-on Developers and Their Security Track Record
Elementor’s extensibility is one of its greatest strengths, but it also introduces potential security risks. Before installing any add-on, research the developer’s reputation and security track record. Look for add-ons from reputable developers with a history of releasing high-quality, secure code. Check the WordPress.org plugin repository for reviews and ratings. A large number of positive reviews and a high rating are generally good indicators, but be cautious of fake reviews. Also, examine the support history of the plugin. Does the developer respond promptly to support requests and security vulnerabilities? Have they addressed past security issues quickly and effectively? Search online for any reported security vulnerabilities associated with the add-on or the developer. Use resources like the National Vulnerability Database (NIST NVD) to check for known vulnerabilities. If you find any red flags, such as a history of security breaches or a lack of developer support, avoid installing the add-on. Decision criteria for choosing add-ons should prioritize security over features. Pitfalls include blindly installing add-ons without proper research or relying solely on the number of downloads as a measure of security.
Only Installing Necessary Add-ons: Reduce Bloat, Reduce Risk
Every add-on you install increases the attack surface of your website. Therefore, it’s crucial to only install add-ons that are absolutely necessary for your website’s functionality. Avoid installing add-ons simply because they offer a “cool” feature or a design element that you might use once in a while. The more add-ons you have installed, the more code that needs to be maintained and updated, and the more potential vulnerabilities that can be exploited by attackers. Regularly review your installed add-ons and remove any that are no longer needed. Consider whether the functionality provided by an add-on can be achieved through other means, such as custom code or a different plugin. For example, if you are using an add-on solely for a single element like a testimonial slider, consider finding a lighter alternative or coding the slider yourself. By minimizing the number of add-ons, you reduce the risk of security vulnerabilities and improve the performance of your website. Example: A website used five different add-ons for various functions, but after careful review, three of the add-ons were consolidated into a single, more efficient plugin, eliminating two potential security risks.
Keeping Add-ons Updated and Monitoring for Security Vulnerabilities
Keeping your add-ons updated is one of the most important steps you can take to protect your website from security vulnerabilities. Plugin developers regularly release updates to address security flaws and improve performance. These updates often contain critical security patches that can prevent attackers from exploiting known vulnerabilities. Enable automatic updates for your add-ons to ensure that they are always running the latest versions. If automatic updates are not possible, regularly check for updates manually and install them promptly. Monitor security news and vulnerability databases for any reported security issues associated with your installed add-ons. Subscribe to security mailing lists and follow security experts on social media to stay informed about the latest threats. Consider using a security plugin that provides vulnerability scanning and alerts you to any known vulnerabilities in your installed add-ons. When a vulnerability is reported, immediately update the add-on or remove it from your website. Ignoring security updates can leave your website vulnerable to attack. This proactive approach to security can significantly reduce the risk of your Elementor website being compromised, in addition to the tips outlined in essential security guides.
What To Do If Your Elementor Site Is Hacked: Incident Response Checklist
Isolating the Affected Website: Preventing Further Damage
The first step in responding to a website hack is to isolate the affected website to prevent further damage. This means taking the website offline or restricting access to it. If your website is part of a multi-site network, immediately disconnect it from the network to prevent the malware from spreading to other sites. Change all passwords associated with the website, including the WordPress admin password, database password, and FTP/SFTP credentials. Suspend or disable user accounts that may have been compromised. If you suspect that your hosting environment has been compromised, contact your hosting provider immediately. They may be able to provide assistance with isolating the affected server and preventing further damage. Consider implementing a temporary firewall rule to block all incoming traffic to the website, except for your own IP address. This will prevent attackers from accessing the website and potentially causing further harm. Decision criteria for isolating the website should prioritize containing the damage and preventing the spread of malware. Pitfalls include delaying isolation or failing to change compromised passwords.
Identifying the Source of the Attack: Analyzing Logs and Scan Results
After isolating the website, the next step is to identify the source of the attack. This involves analyzing server logs, firewall logs, and security scan results to determine how the attackers gained access to the website and what actions they performed. Examine the server logs for any suspicious activity, such as unusual login attempts, unexpected file modifications, or requests for sensitive files. Analyze the firewall logs to identify any blocked IP addresses or malicious requests. Run a comprehensive security scan of the website using a reputable security scanner. The scan should identify any malware, vulnerabilities, or other security issues. Review the audit logs for any unauthorized changes to pages, templates, or user permissions, as discussed in our previous coverage of WordPress SEO and security. Correlate the information from the various logs and scan results to piece together a timeline of the attack. Identify the entry point used by the attackers, such as a vulnerable plugin, a weak password, or a misconfigured server setting. Once you have identified the source of the attack, you can take steps to patch the vulnerability and prevent future attacks. Example: A hacked website’s logs revealed a brute-force attack against the wp-login.php page, indicating a weak password policy as the vulnerability.
Cleaning and Restoring Your Elementor Website: Best Practices for Recovery
Once you have identified the source of the attack and patched the vulnerability, you can begin cleaning and restoring your website. This involves removing any malware, repairing any damage, and restoring the website to a clean state. Start by removing any malware that was identified by the security scan. This may involve deleting infected files, cleaning up malicious code, and removing any backdoors that were installed by the attackers. Restore your website from a clean backup that was created before the attack. Ensure that the backup is free of malware and vulnerabilities. If you don’t have a clean backup, you may need to manually clean the website by removing any malicious code and repairing any damage. Update all plugins, themes, and WordPress core to the latest versions. Change all passwords again, including the WordPress admin password, database password, and FTP/SFTP credentials. Monitor the website closely after restoration to ensure that it is functioning properly and that no further security issues arise. Consider implementing a web application firewall (WAF) to protect your website from future attacks.
Post-Incident Analysis: Learning From the Attack and Strengthening Security
After recovering from a security incident, it’s essential to conduct a post-incident analysis to learn from the attack and strengthen your website’s security. Review the incident response process to identify any areas for improvement. What worked well? What could have been done better? Analyze the attack to identify the vulnerabilities that were exploited. How did the attackers gain access to the website? What steps can be taken to prevent similar attacks in the future? Update your security policies and procedures to address any weaknesses that were identified. Implement stronger password policies, enable two-factor authentication, and regularly review user permissions. Conduct regular security audits and vulnerability scans to identify and address any potential security issues before they can be exploited by attackers. Provide security training to your staff to educate them about the latest threats and best practices for protecting your website. Example: Following a hack, a company implemented mandatory two-factor authentication for all user accounts and conducted regular security audits, significantly reducing the risk of future attacks.
By taking these steps, you can significantly reduce the risk of your Elementor website being hacked and ensure that you are prepared to respond effectively if an attack does occur. Implementing these measures can help protect your website, safeguard your data, and maintain your online reputation. As the digital landscape evolves, remaining vigilant and proactive is critical for website security.